This isn’t a bragging blog post- this is the reality of renovating in true time. We moved in August 2019 and here we are December 2020 and there are still updates (even small, simple ones) that need to be done. We both work full time. I have my calligraphy business on the side that takes up a lot of nights and weekends. We also both have errands, and chores, and lives with a lot of commitments that fall on weekends and even nights. Any free time we had/have we try to work on something. We are also human and we need our rest.
When doing updates mainly yourself, it takes time and lots of patience. When you see ‘before and afters’ on Instagram, you have to take it with a grain of salt. How long did that actually take? Did they hire someone to do all of that work? What is their budget? It’s easy to look at a picture and say ‘that’s what I want’ but so much more goes into it. I wanted to show how much we’ve accomplished but also show how long and tedious some of those updates have really been.
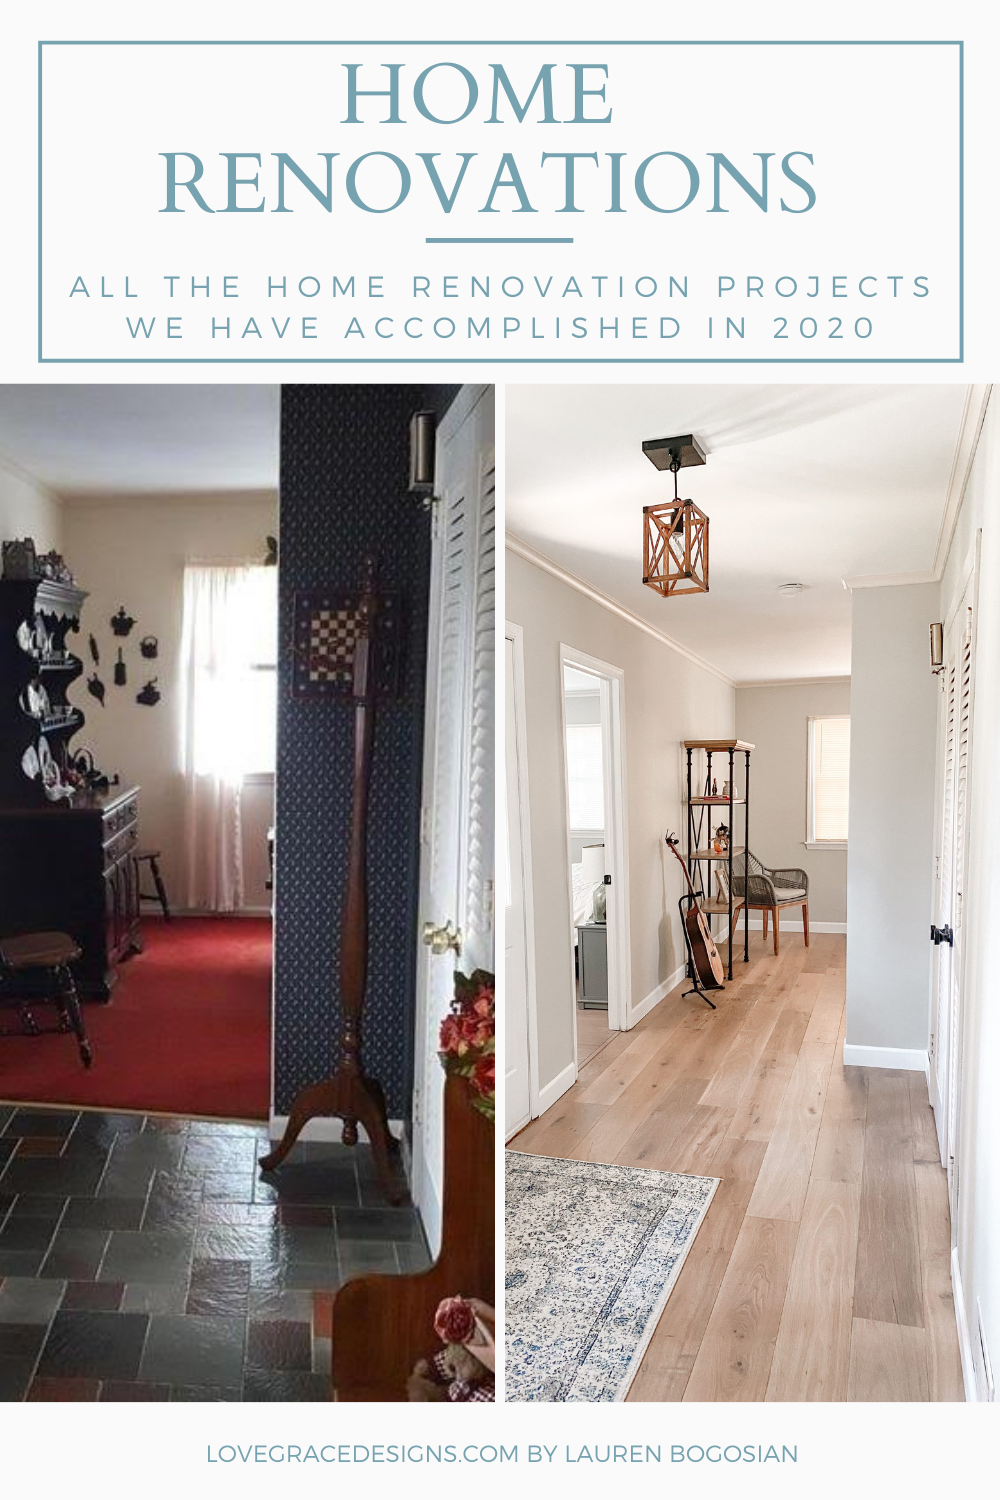
So, here are all the renovations (big and small) we’ve accomplished since August 2019!
2019
We moved in in August 2019 and gave ourselves a couple weeks to fully unpack and settle in before going full force in renovations. We even lived in our house through all of it!
Oh, and I should also note that I lost almost all of my photos from the beginning of our renovation when my phone decided to completely die & couldn’t be recovered in December 2019. I’m still devastated.
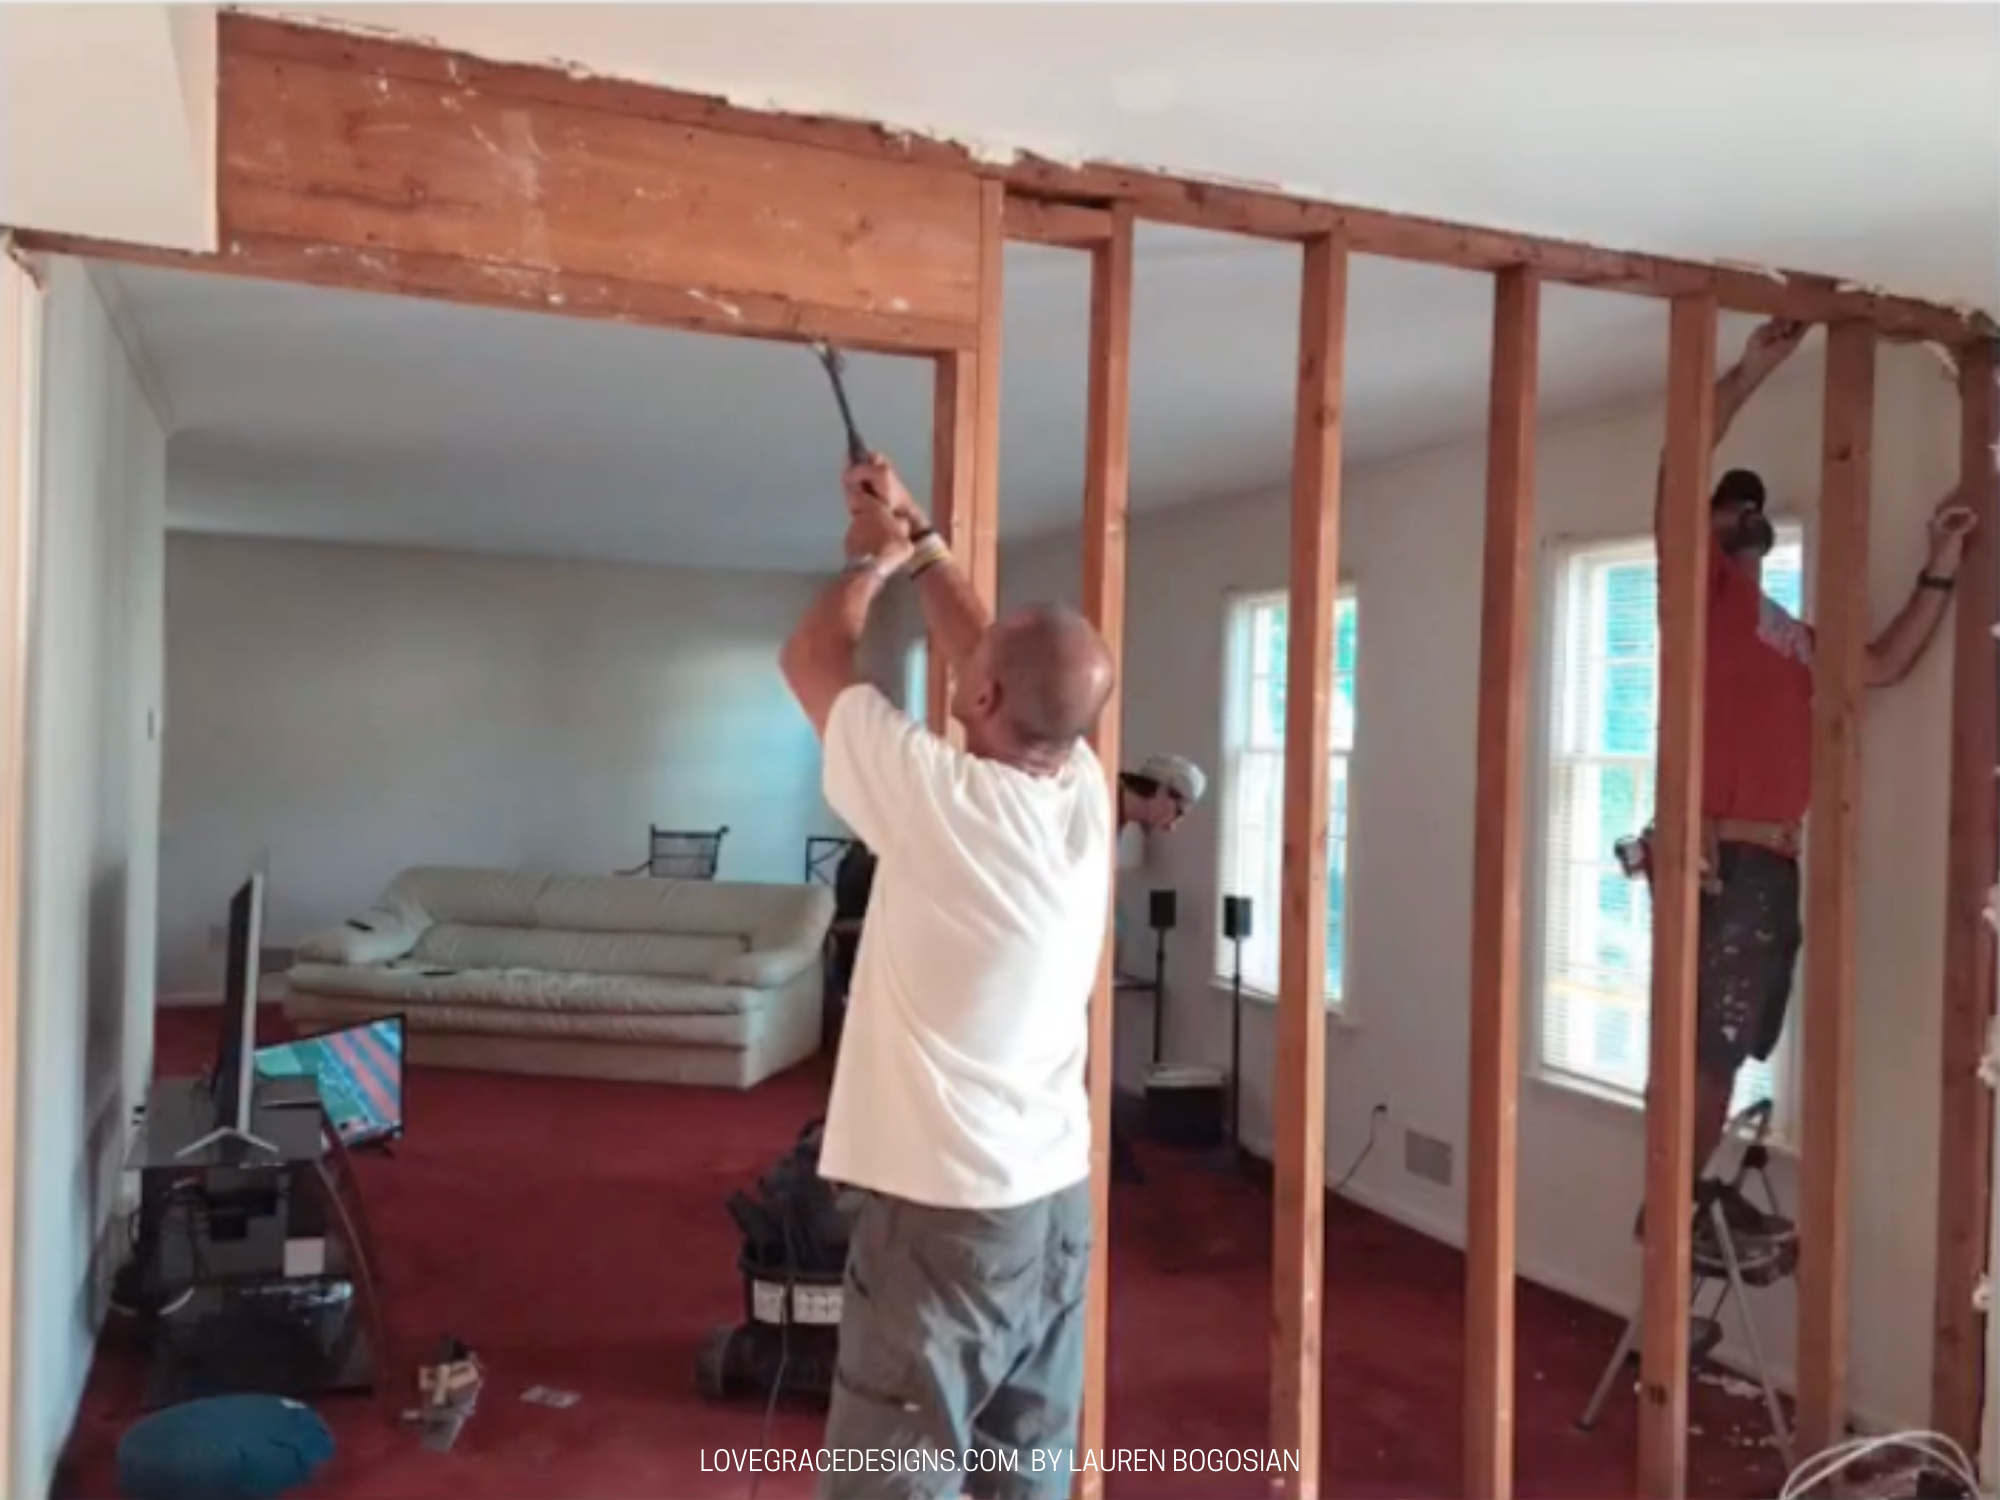
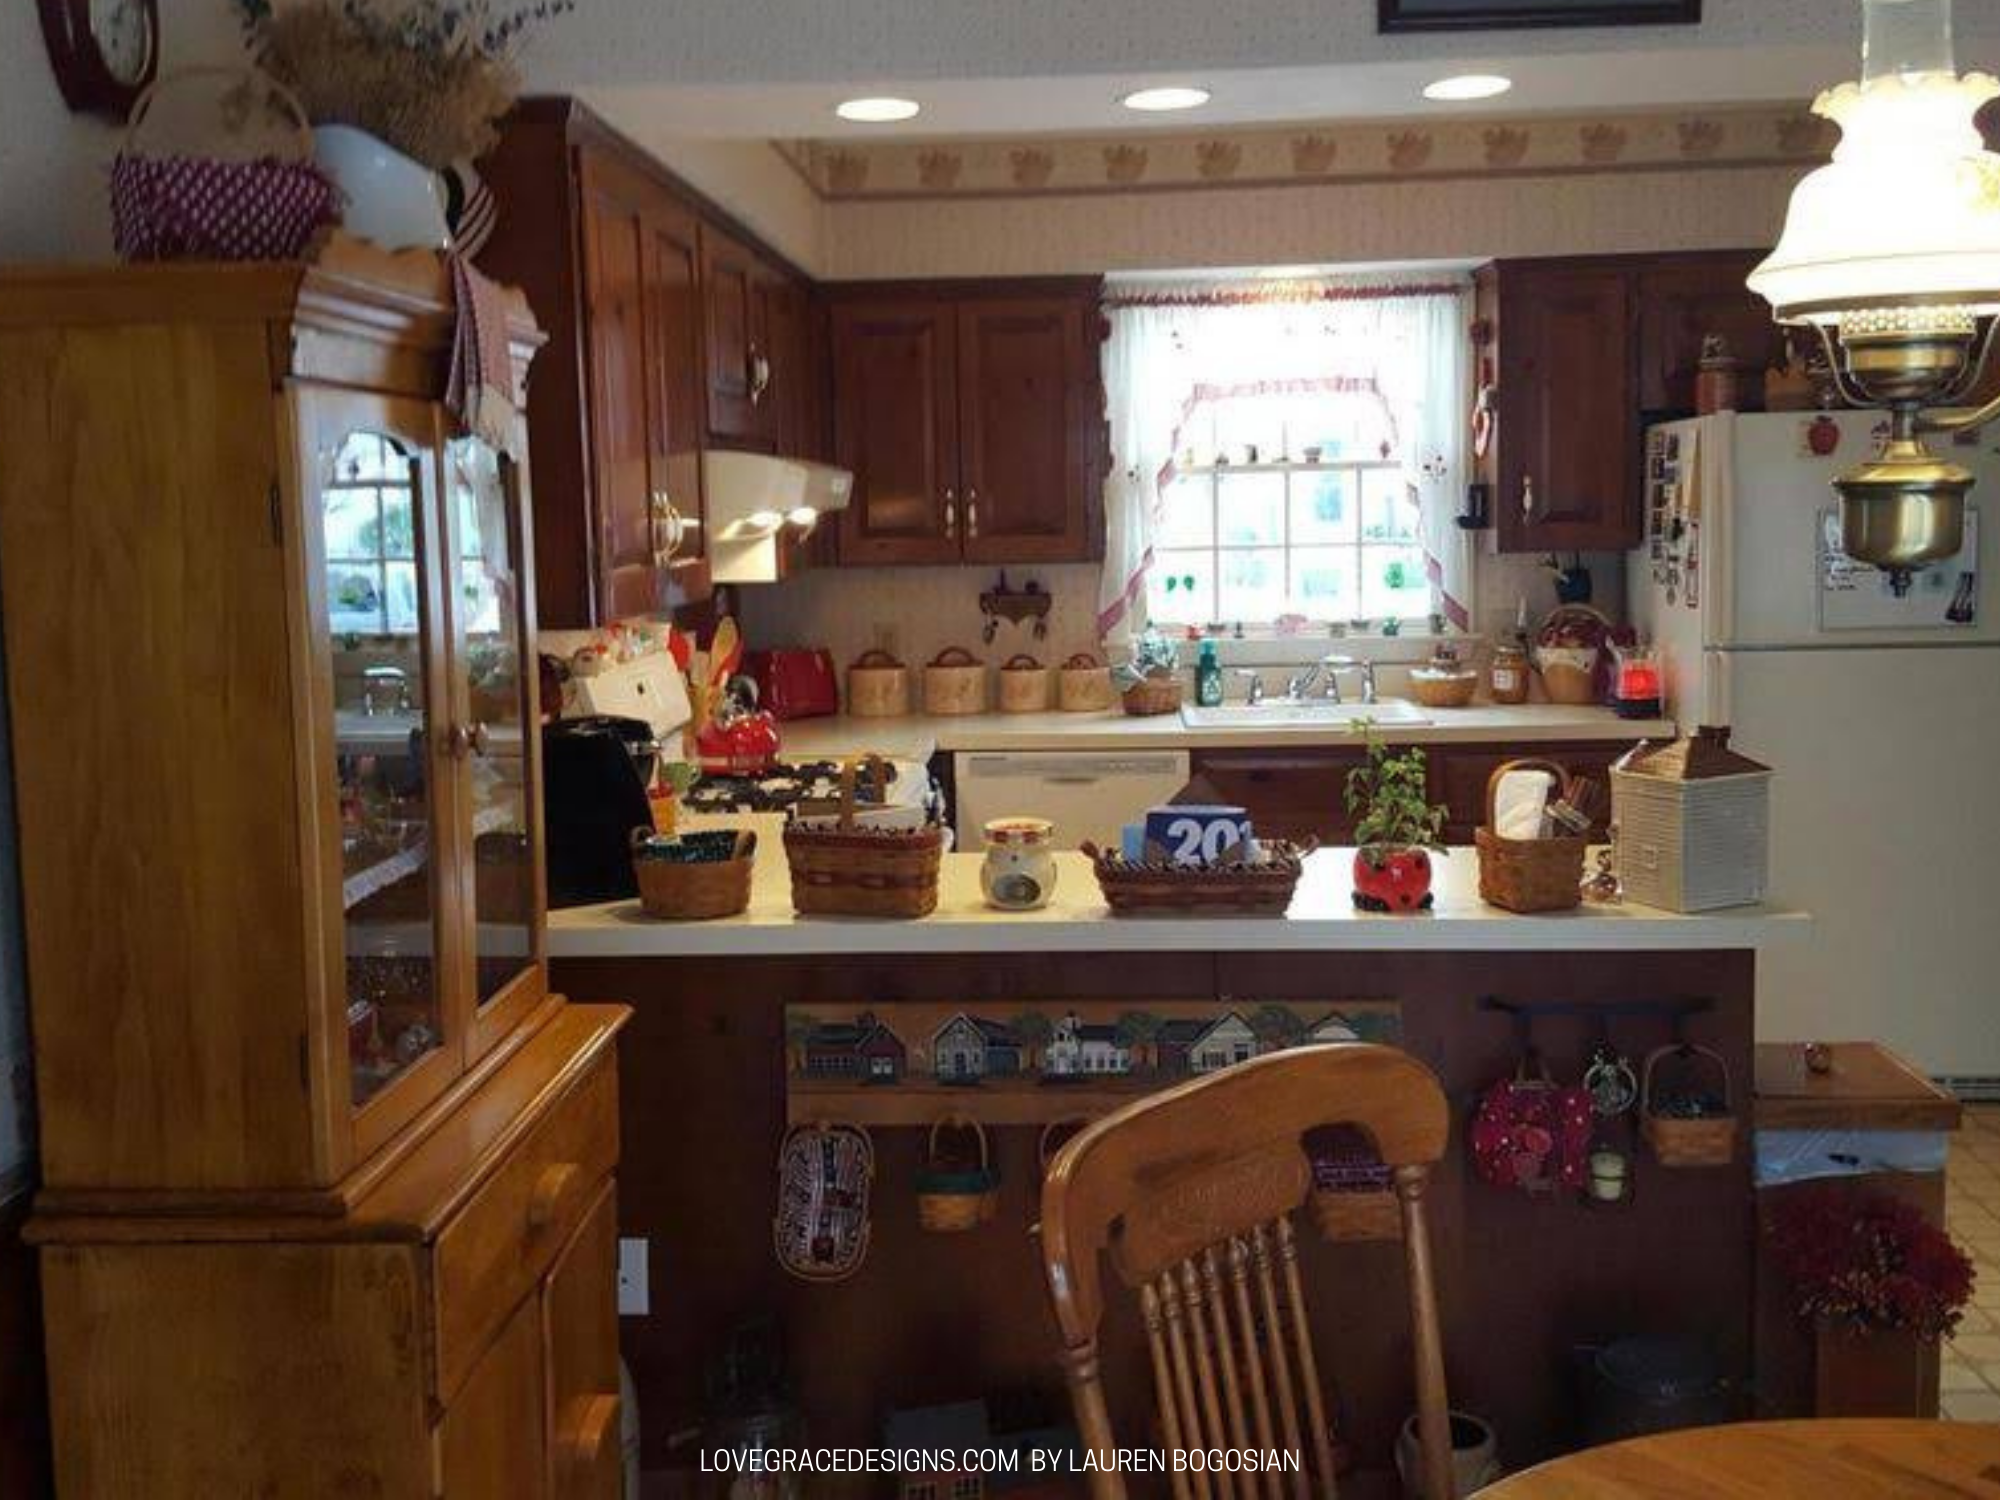
Wall removal
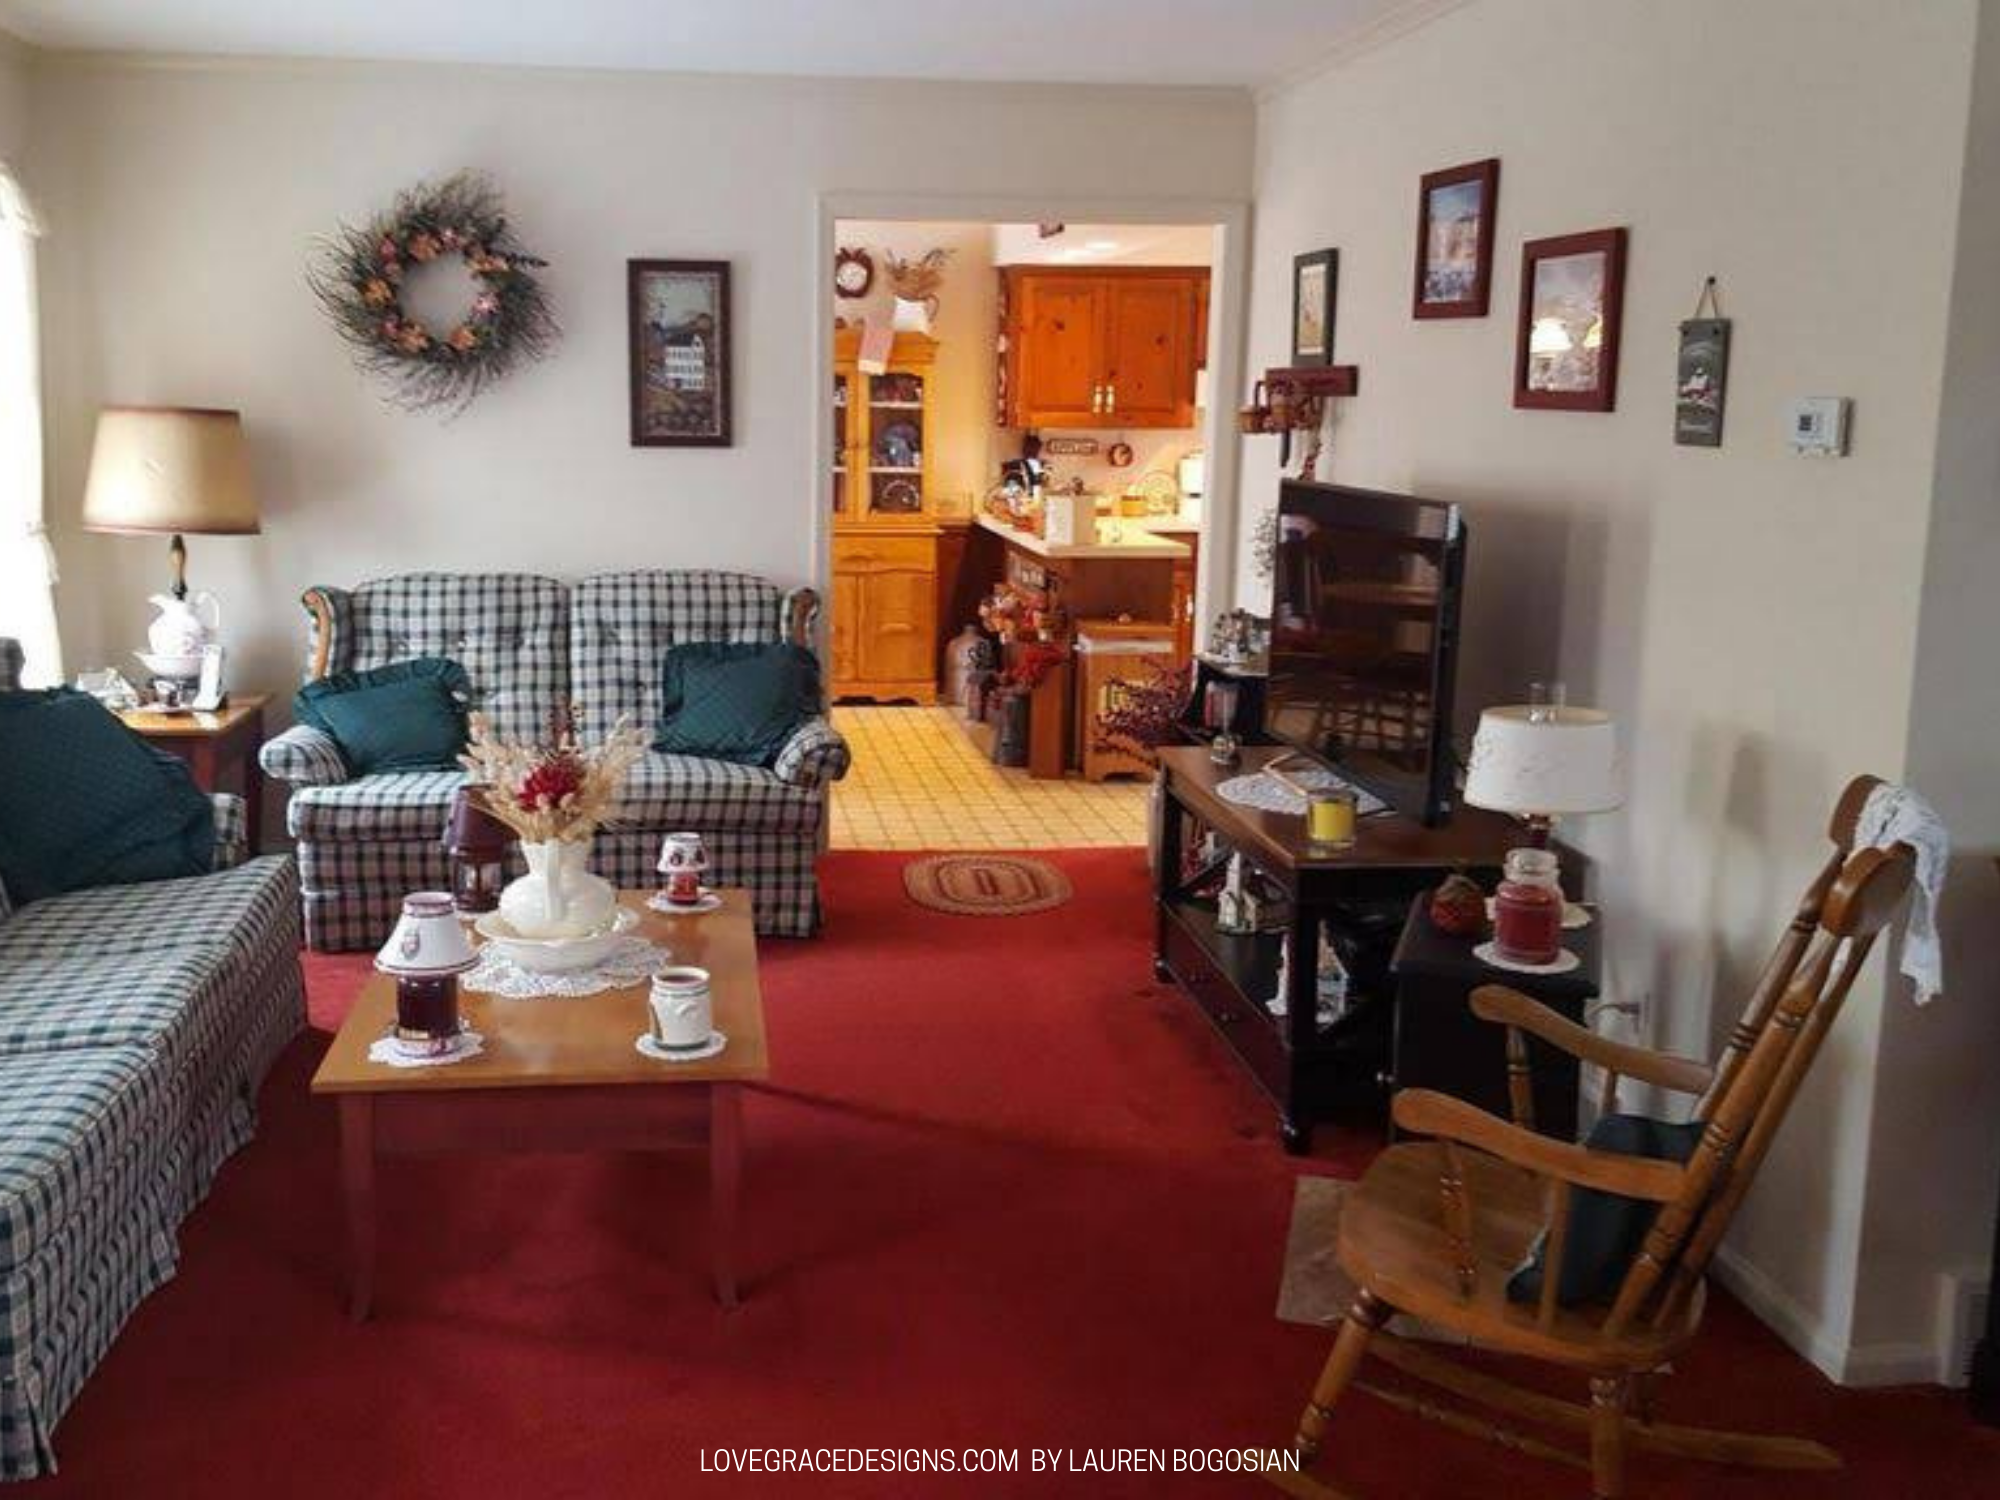
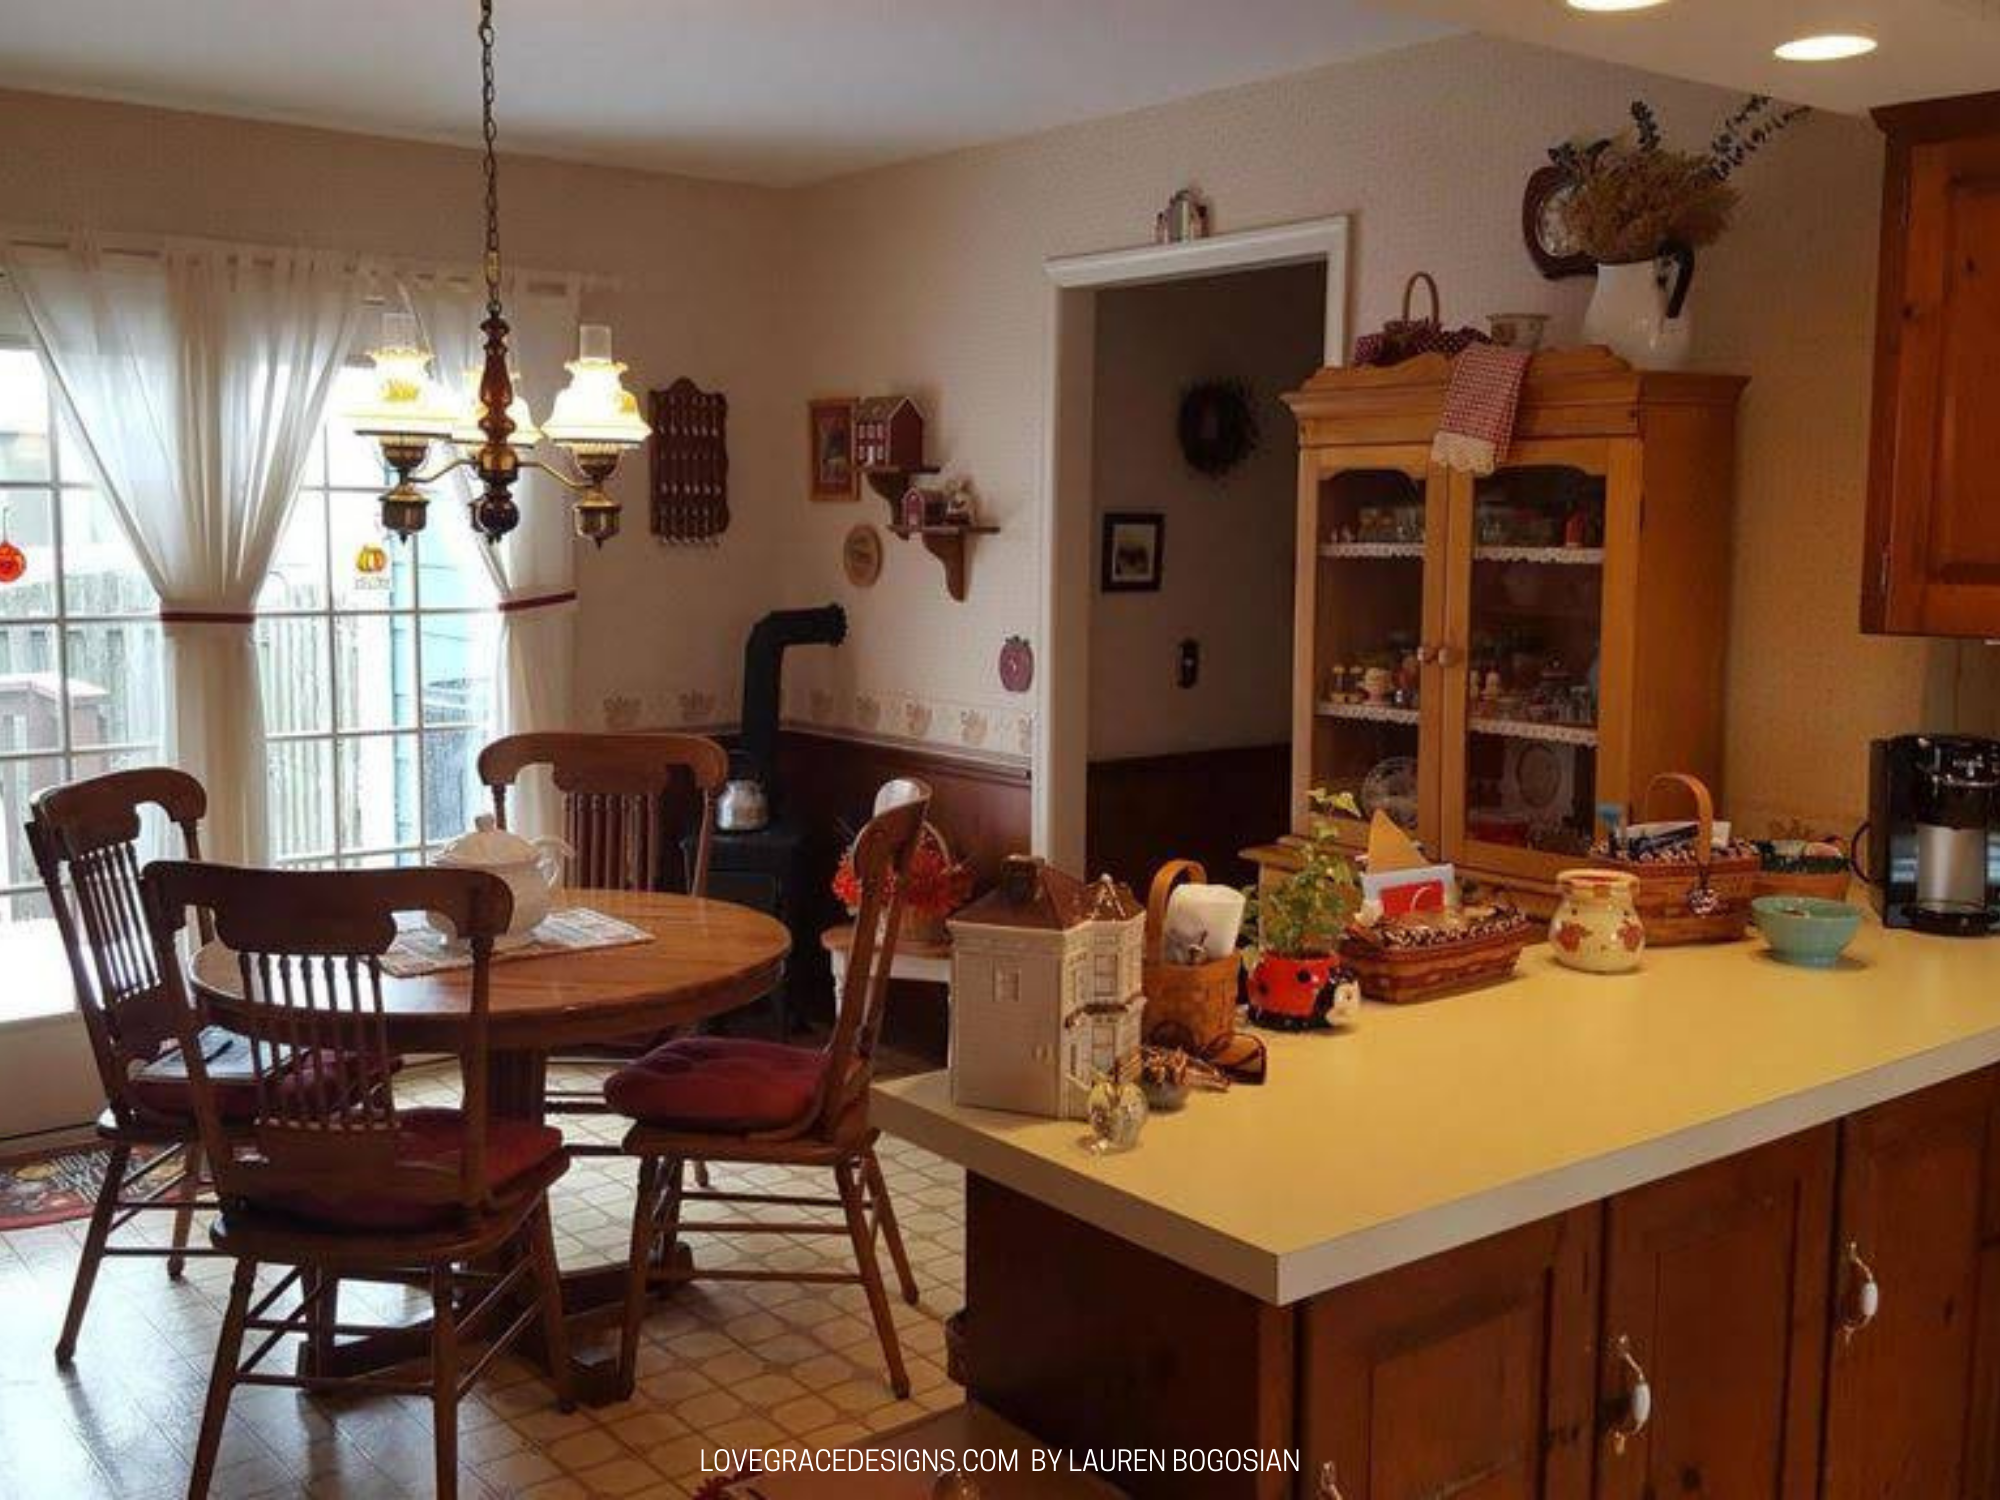
The first thing we wanted to do was remove the wall between the kitchen and what they had set up as their living room. We wanted to replace all of the floors and have them be continuous as an open concept space so we had to remove the wall first in order to get floors installed. Since the wall wasn’t structural, we were able to take the wall down ourselves in the first few weeks living there. We removed the wall in the beginning of September and guess what? Chip Gaines isn’t lying because Demo Day really is fun!

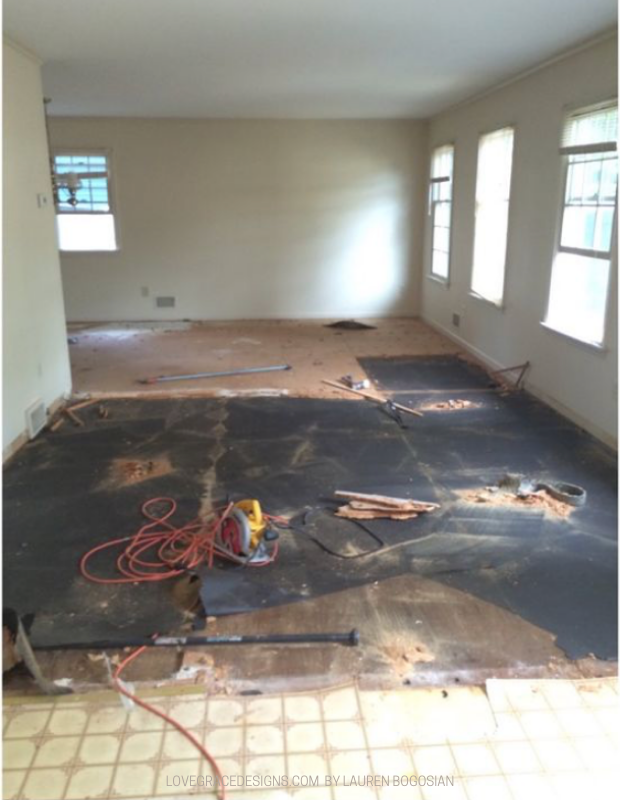
New Floors
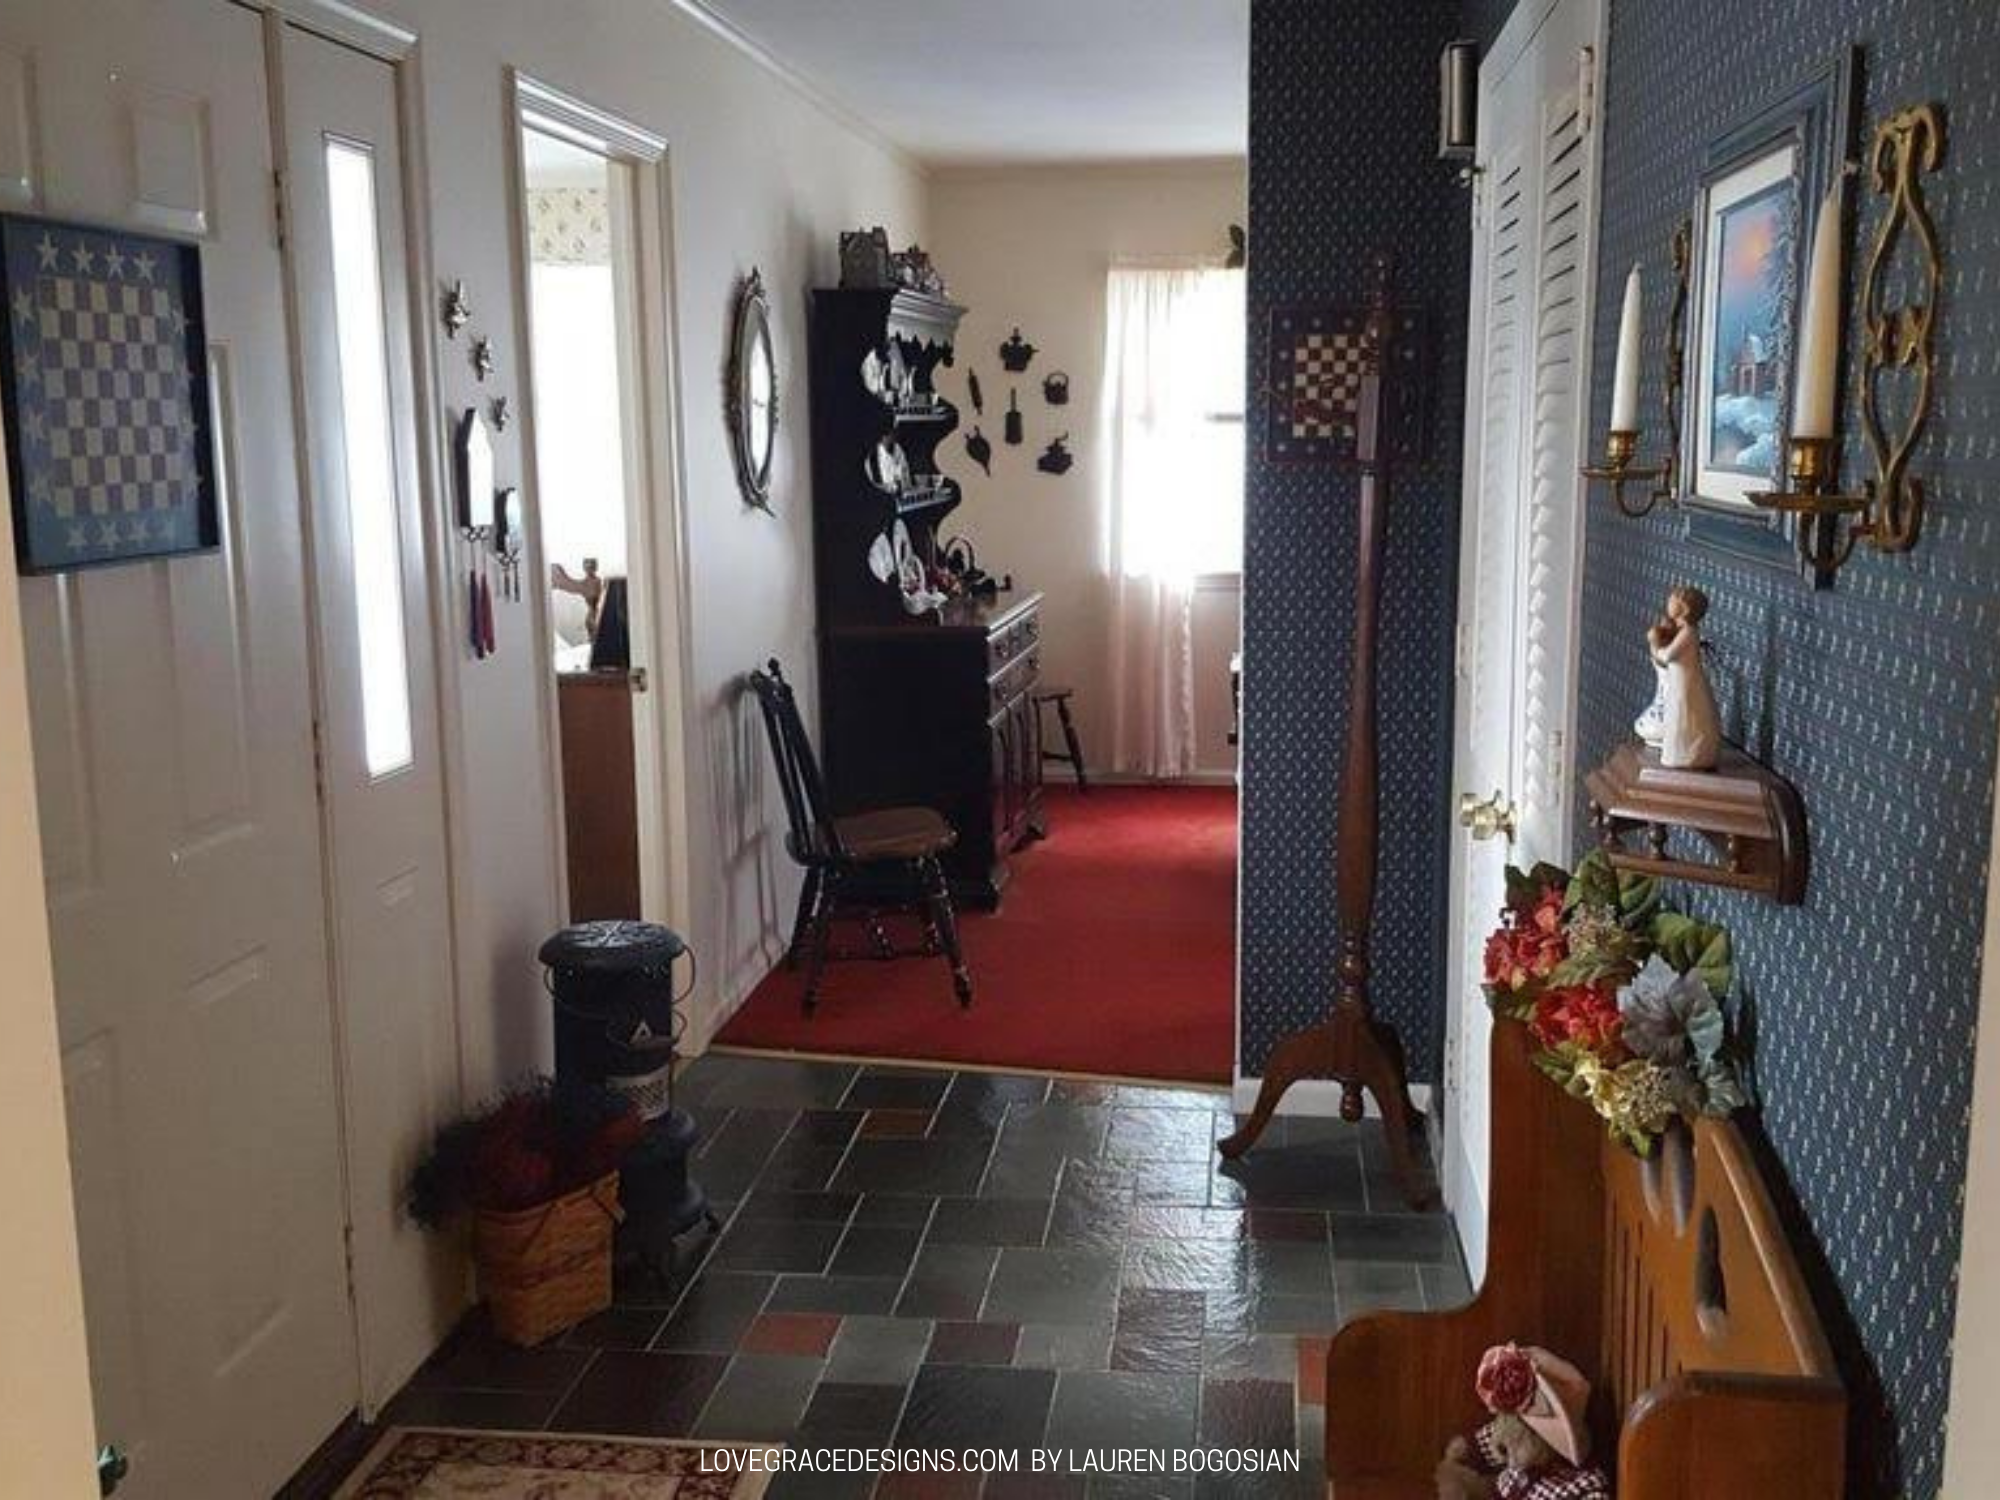
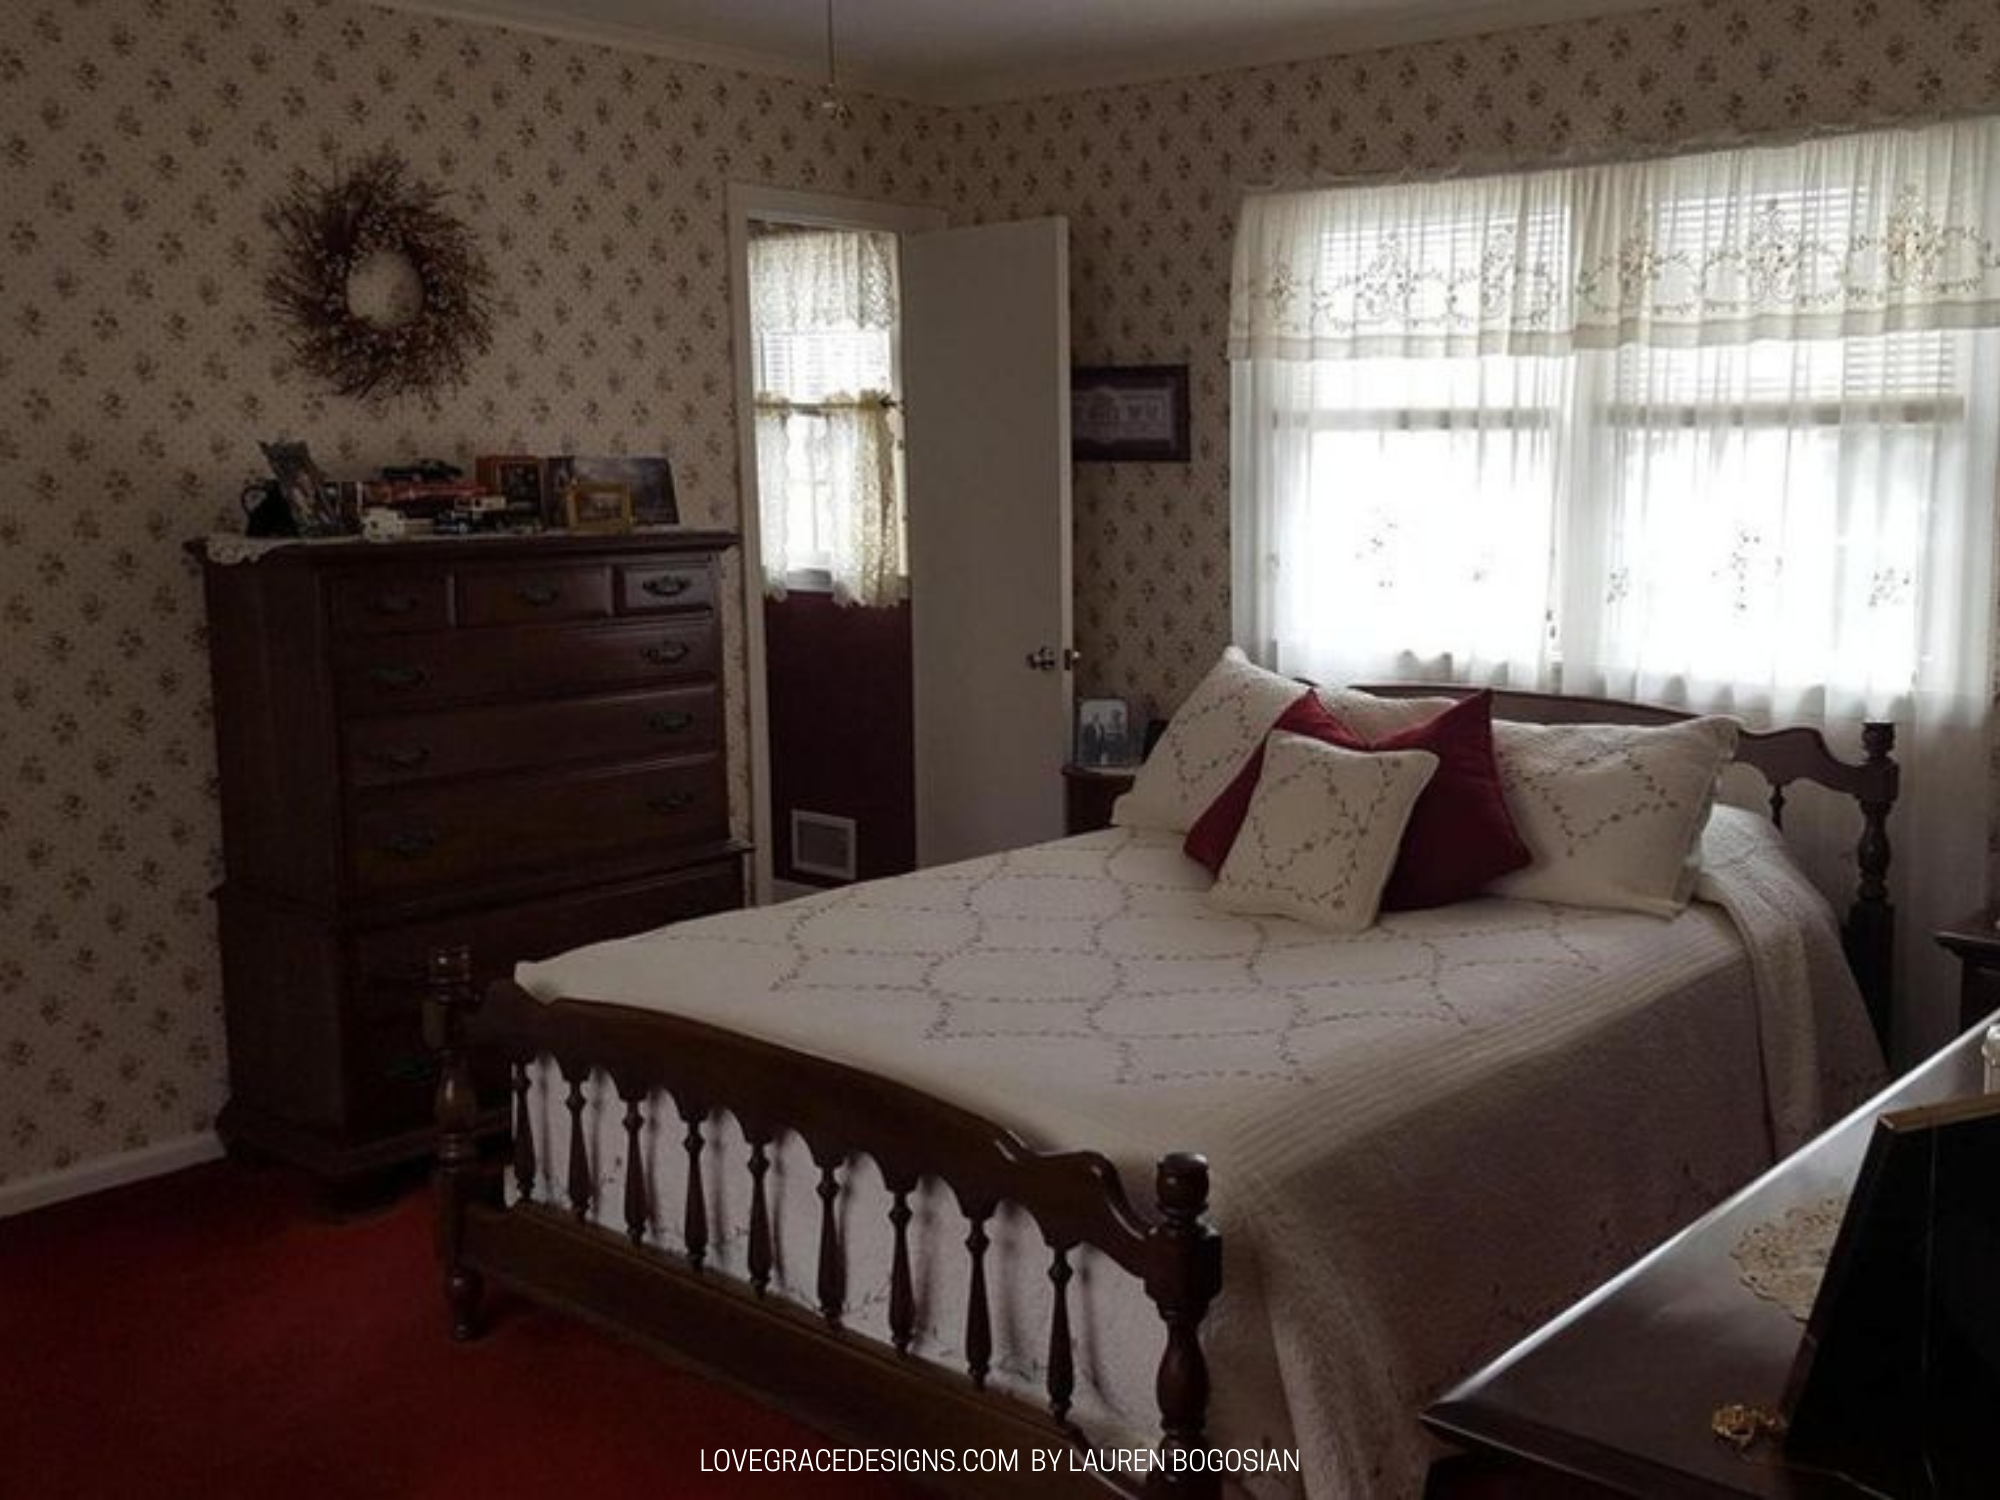
The living room/dining room area had red carpet (so did the master bedroom). The entry way was multi-colored slate stone. The kitchen was laminent. None of the main living areas with all the different flooring had hardwood floors unerneath so new installation was needed. While we were doing demo on the wall, we were still deciding on floors. We got different quotes for new hardwood floor installation and different types of flooring options. We looked at real hardwood, luxury vinyl plank or LVP, and engineered hardwood. I really wanted wide plank which made the cost drastically different so this decision took us a good month or so to decide on. We ultimately went with engineered hardwood.
The master bedroom actually had hardwood under the carpet and we learned that the other 2 bedrooms did as well. The hallway was the only floor that was exposed real hardwood floors. We decided to install the engineered hardwood in the main living areas and then refinish the wood floors in the hallway and master bedroom and stain it as close as possible to the engineered wood floors. The stain isn’t perfect but they compliment each other well to still allow a nice flow throughout the open concept.
Cabinet Hardware and Door Knobs
A simple update and one that made a world of a difference was simply swapping out the old cabinet hardware in the kitchen for new handles and the old brass doorknobs throughout the house for new ones. I went with a matte black option for all of it and so happy with how seamless and clean it made it all look. To make it easier, I made sure that the new kitchen hardware handles had the same hole set up and that the pulls covered the old holes.
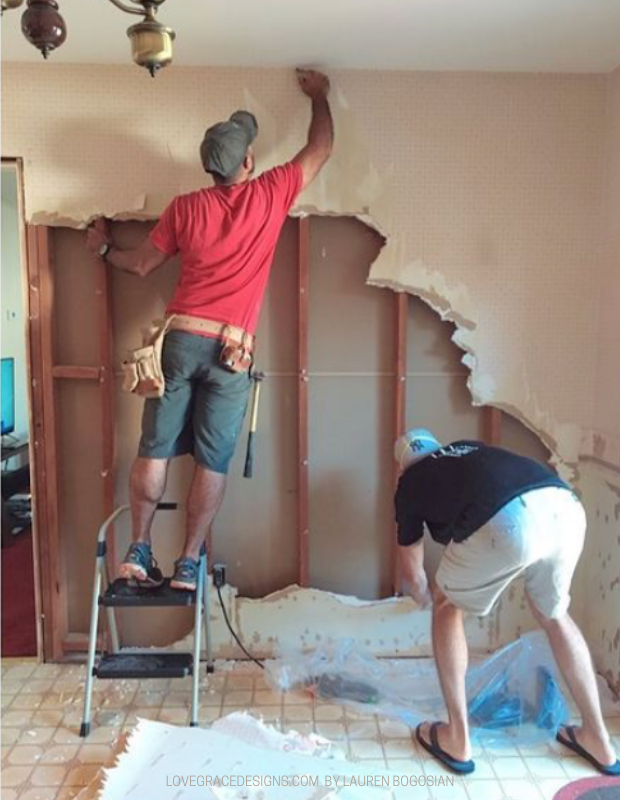
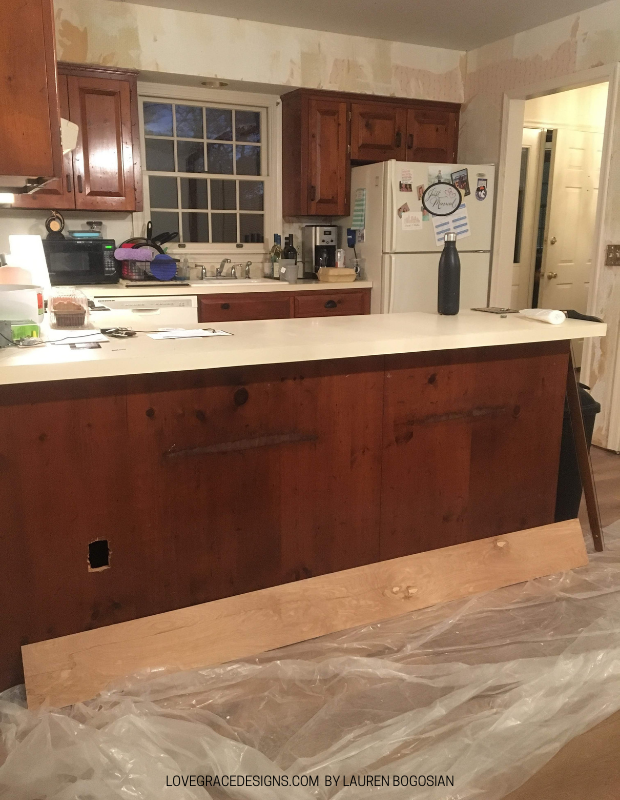
Wall Paper Removal
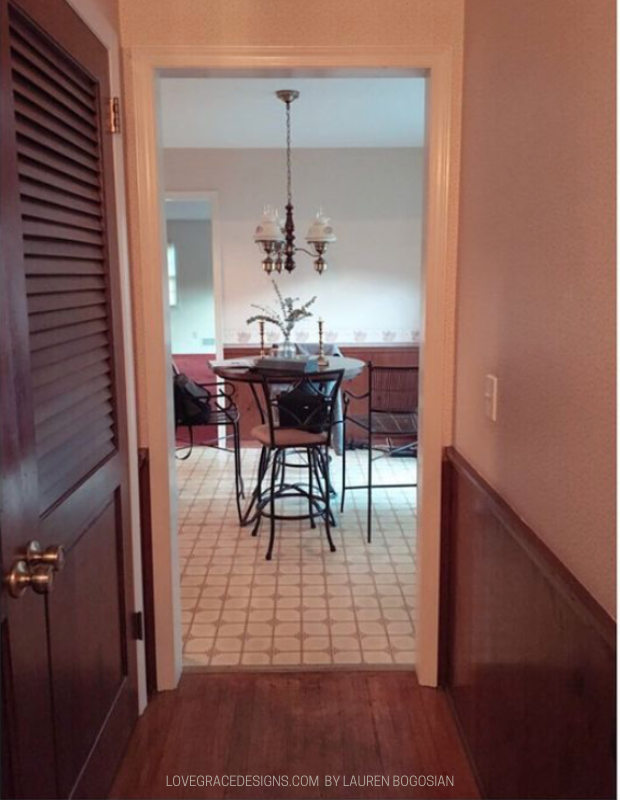
Our house could easily have been named ‘The House of Wallpaper’ on an HGTV show. The living room and dining room areas were the only rooms in the house that did not have wall paper, so THANKFULLY there was some bit of relief. The rest including, the entryway, the kitchen/breakfast area, hallway, all 3 bedrooms, and the master bathroom all had wallpaper. They redid their main hallway bathroom before putting it on the market and just primed it to allow the buyer to do what they pleased (we were also thankful for that!).
We started wall paper removal in the kitchen/breakfast area, entryway, hallway, master bedroom, and master bathroom. The kitchen ALSO had half wall old school wood paneling that we decided to take off. The walls were pretty beat up from layers of wallpaper so a lot of prep work went into fixing them after all of the wallpaper was removed. The wallpaper removal for those areas took months. We worked on them every evening after work and on the weekends, and my husband did most of the heavy lifiting since we only had one steamer (that was the method that worked best for us). We had to Guardz a lot of areas and then go in and spackle to prep the walls to be painted.

Paint
Now that the wallpaper was off in the main areas, we could finally paint.
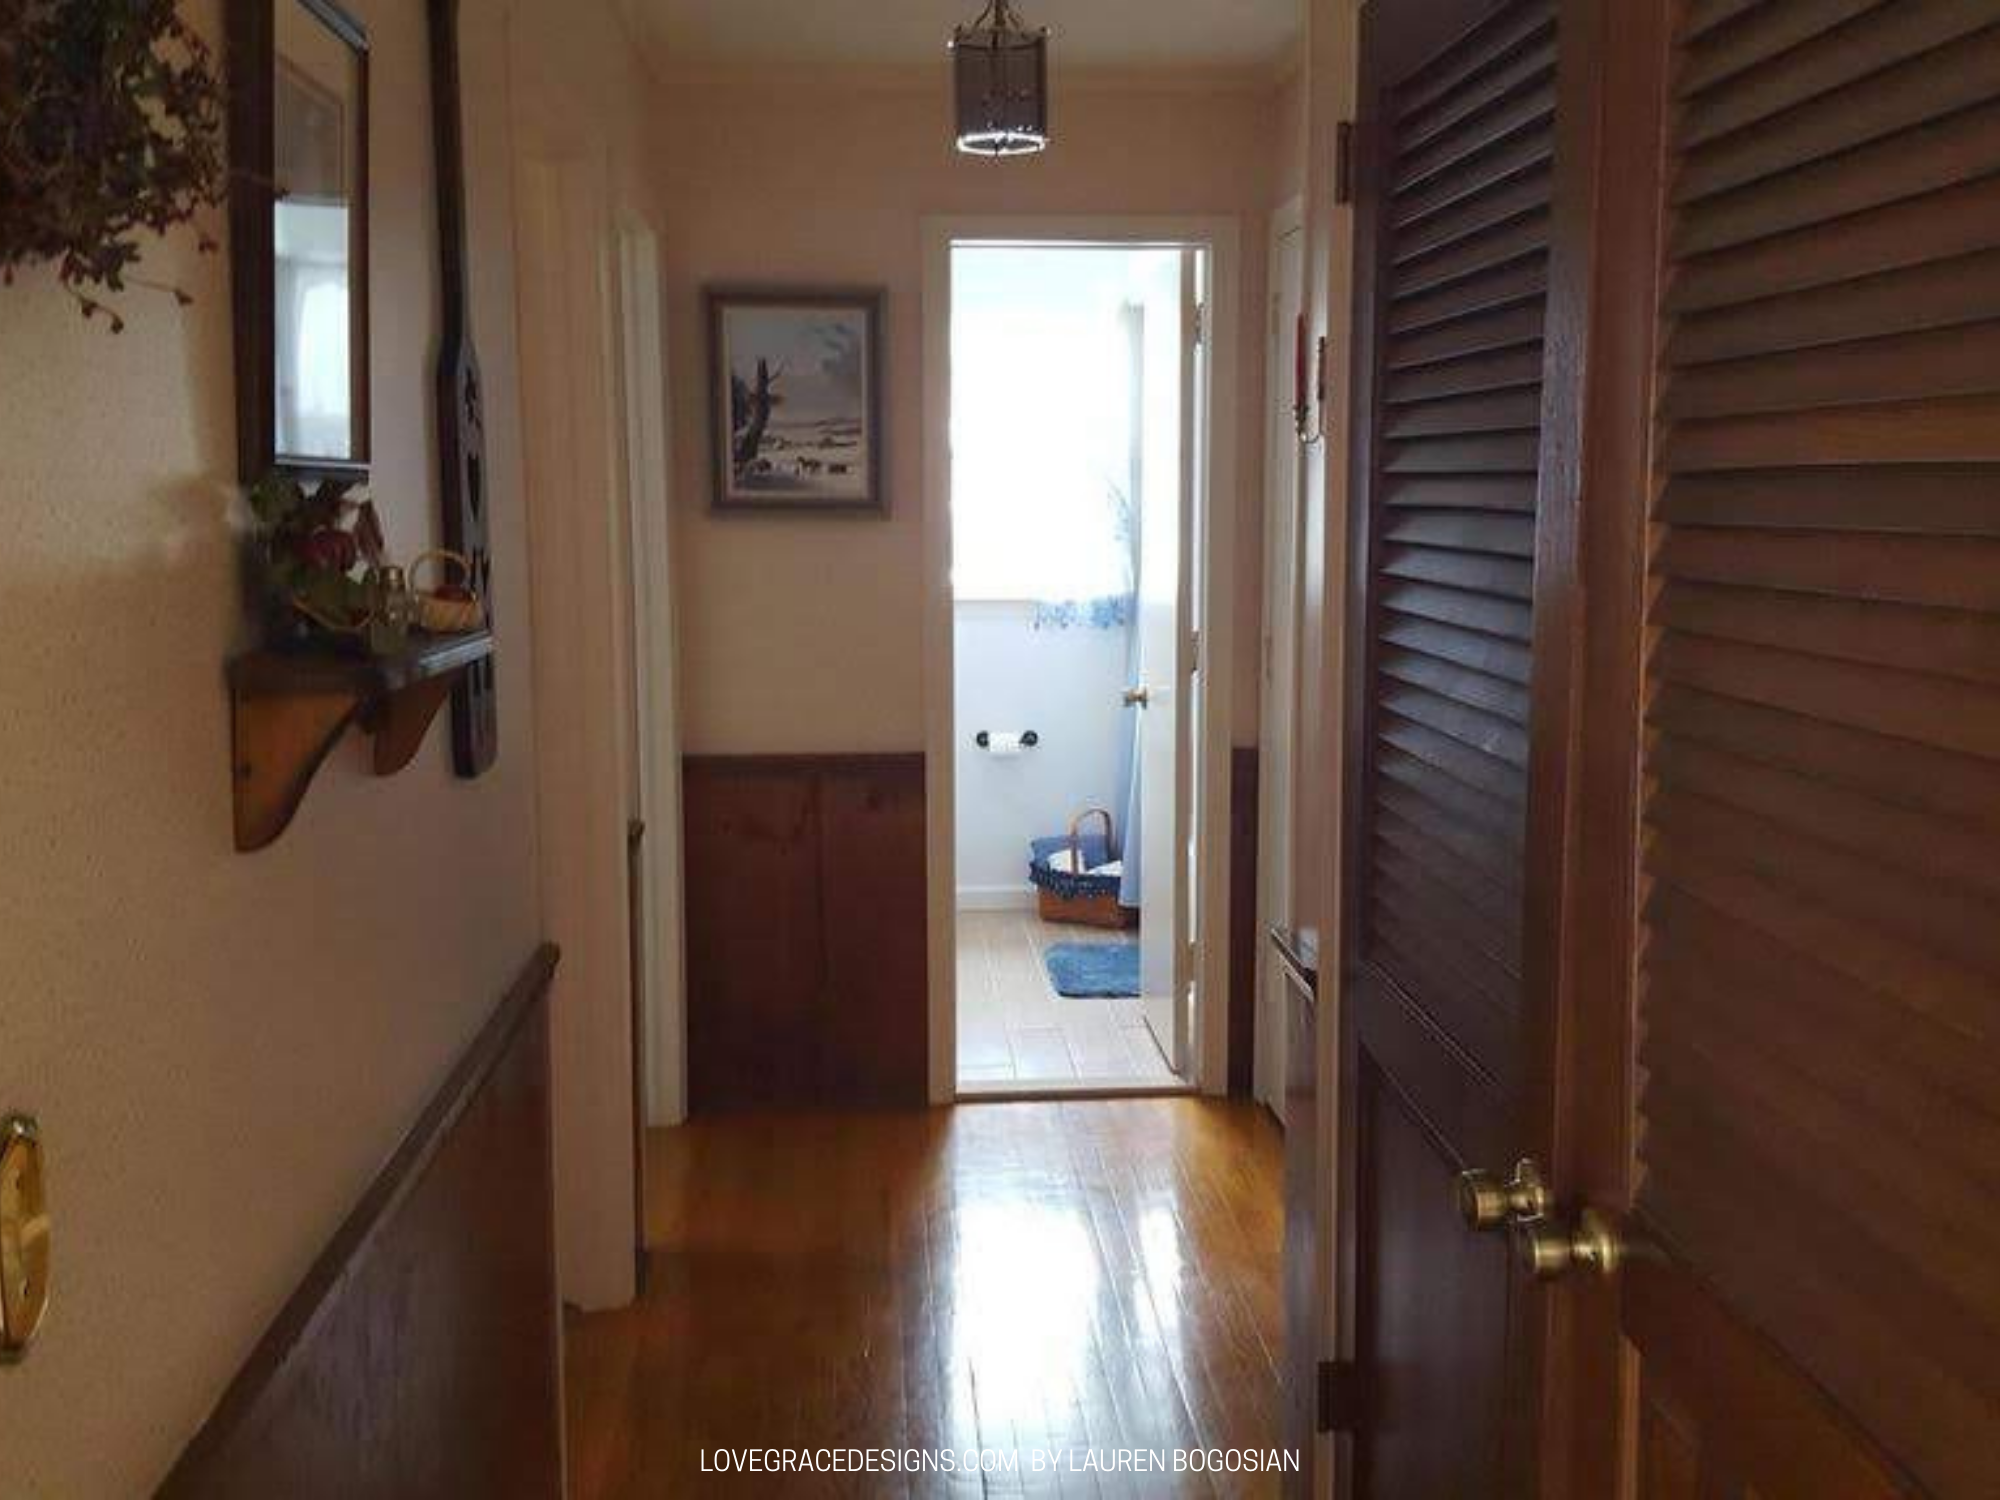
We painted the whole main area the same color. For the hallway, we have more wood paneling but I decided to leave that and paint the bottom paneling white (same color as the trim) and the top wall the same color as the rest of the house.
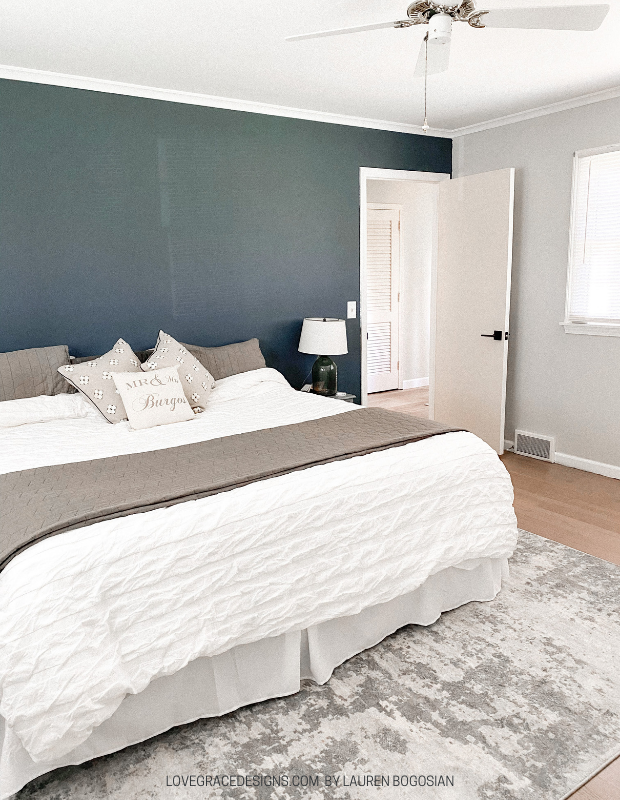
The bedroom was also ready to be painted and we did one accent wall while the other 3 walls and the master bathroom would be painted all the same color.
The trim throughout the house would also be the same white color. The trim and their doors are all a creamy/pinkish color. The trim around the windows is the same color AND the windows along with the grille inserts are all painted that same color. We painted the new bottom trim we installed and then some of the door jams in the main living areas. We painted all of the trim in the master bedroom. Then we got to the hallway and I half painted some of the door jams and didn’t finish the rest. (Like, I legitimately painted halfway up the trim when I was painting the paneling in the hallway and never went higher than my height. I know that’s a major painting no-no but I was so over it.)
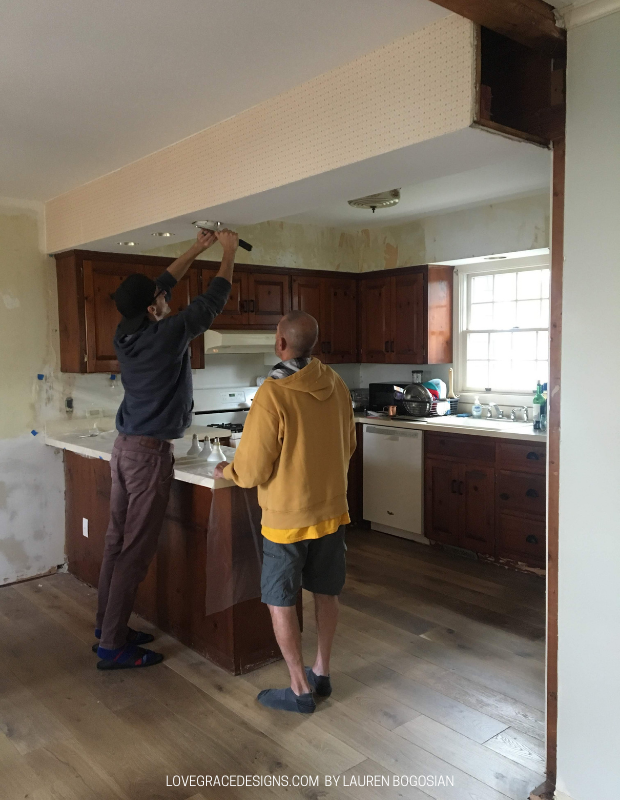
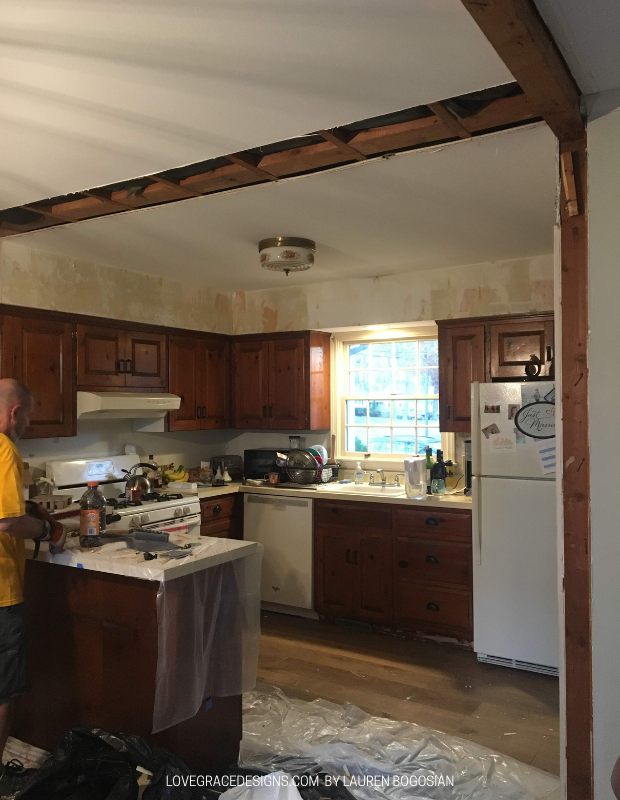
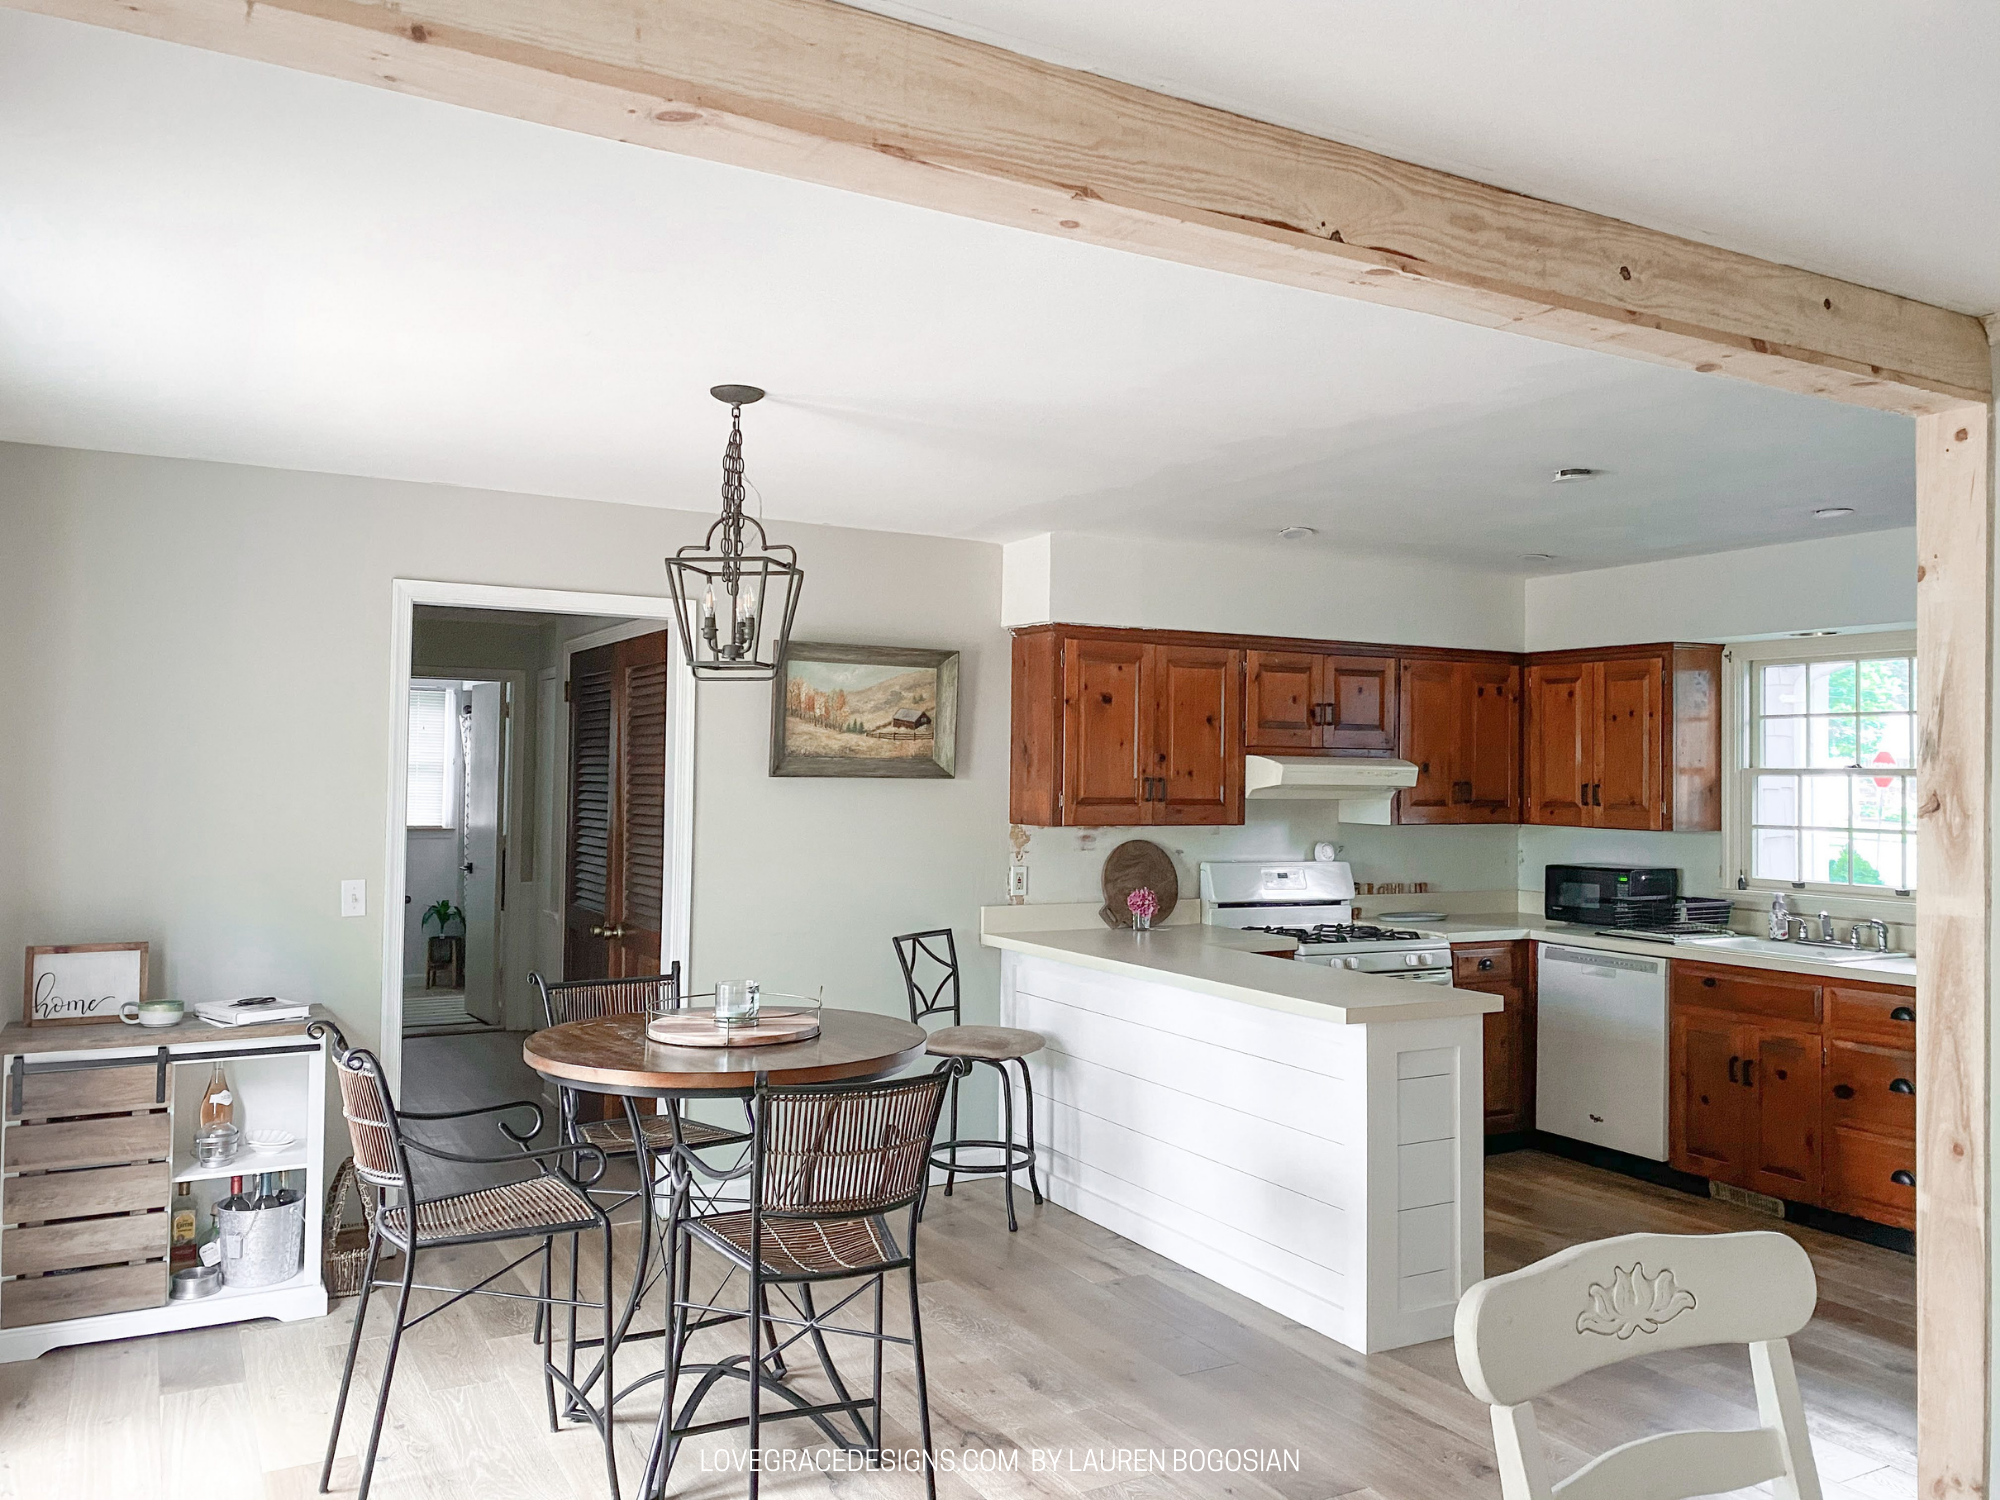
Soffit Removal
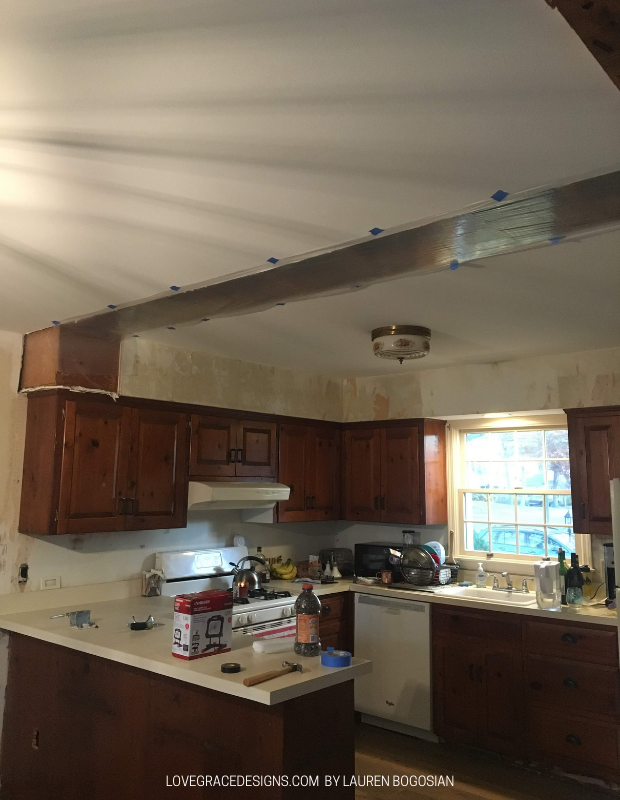
We wanted to get recessed lighting in the living room (which was their dining room) and in our kitchen. They had recessed lighting in a soffit that went over the kitchen peninsula but when we looked into from the attic, it was empty. That meant there was no reason to have a soffit, so yes, I wanted that out ASAP!
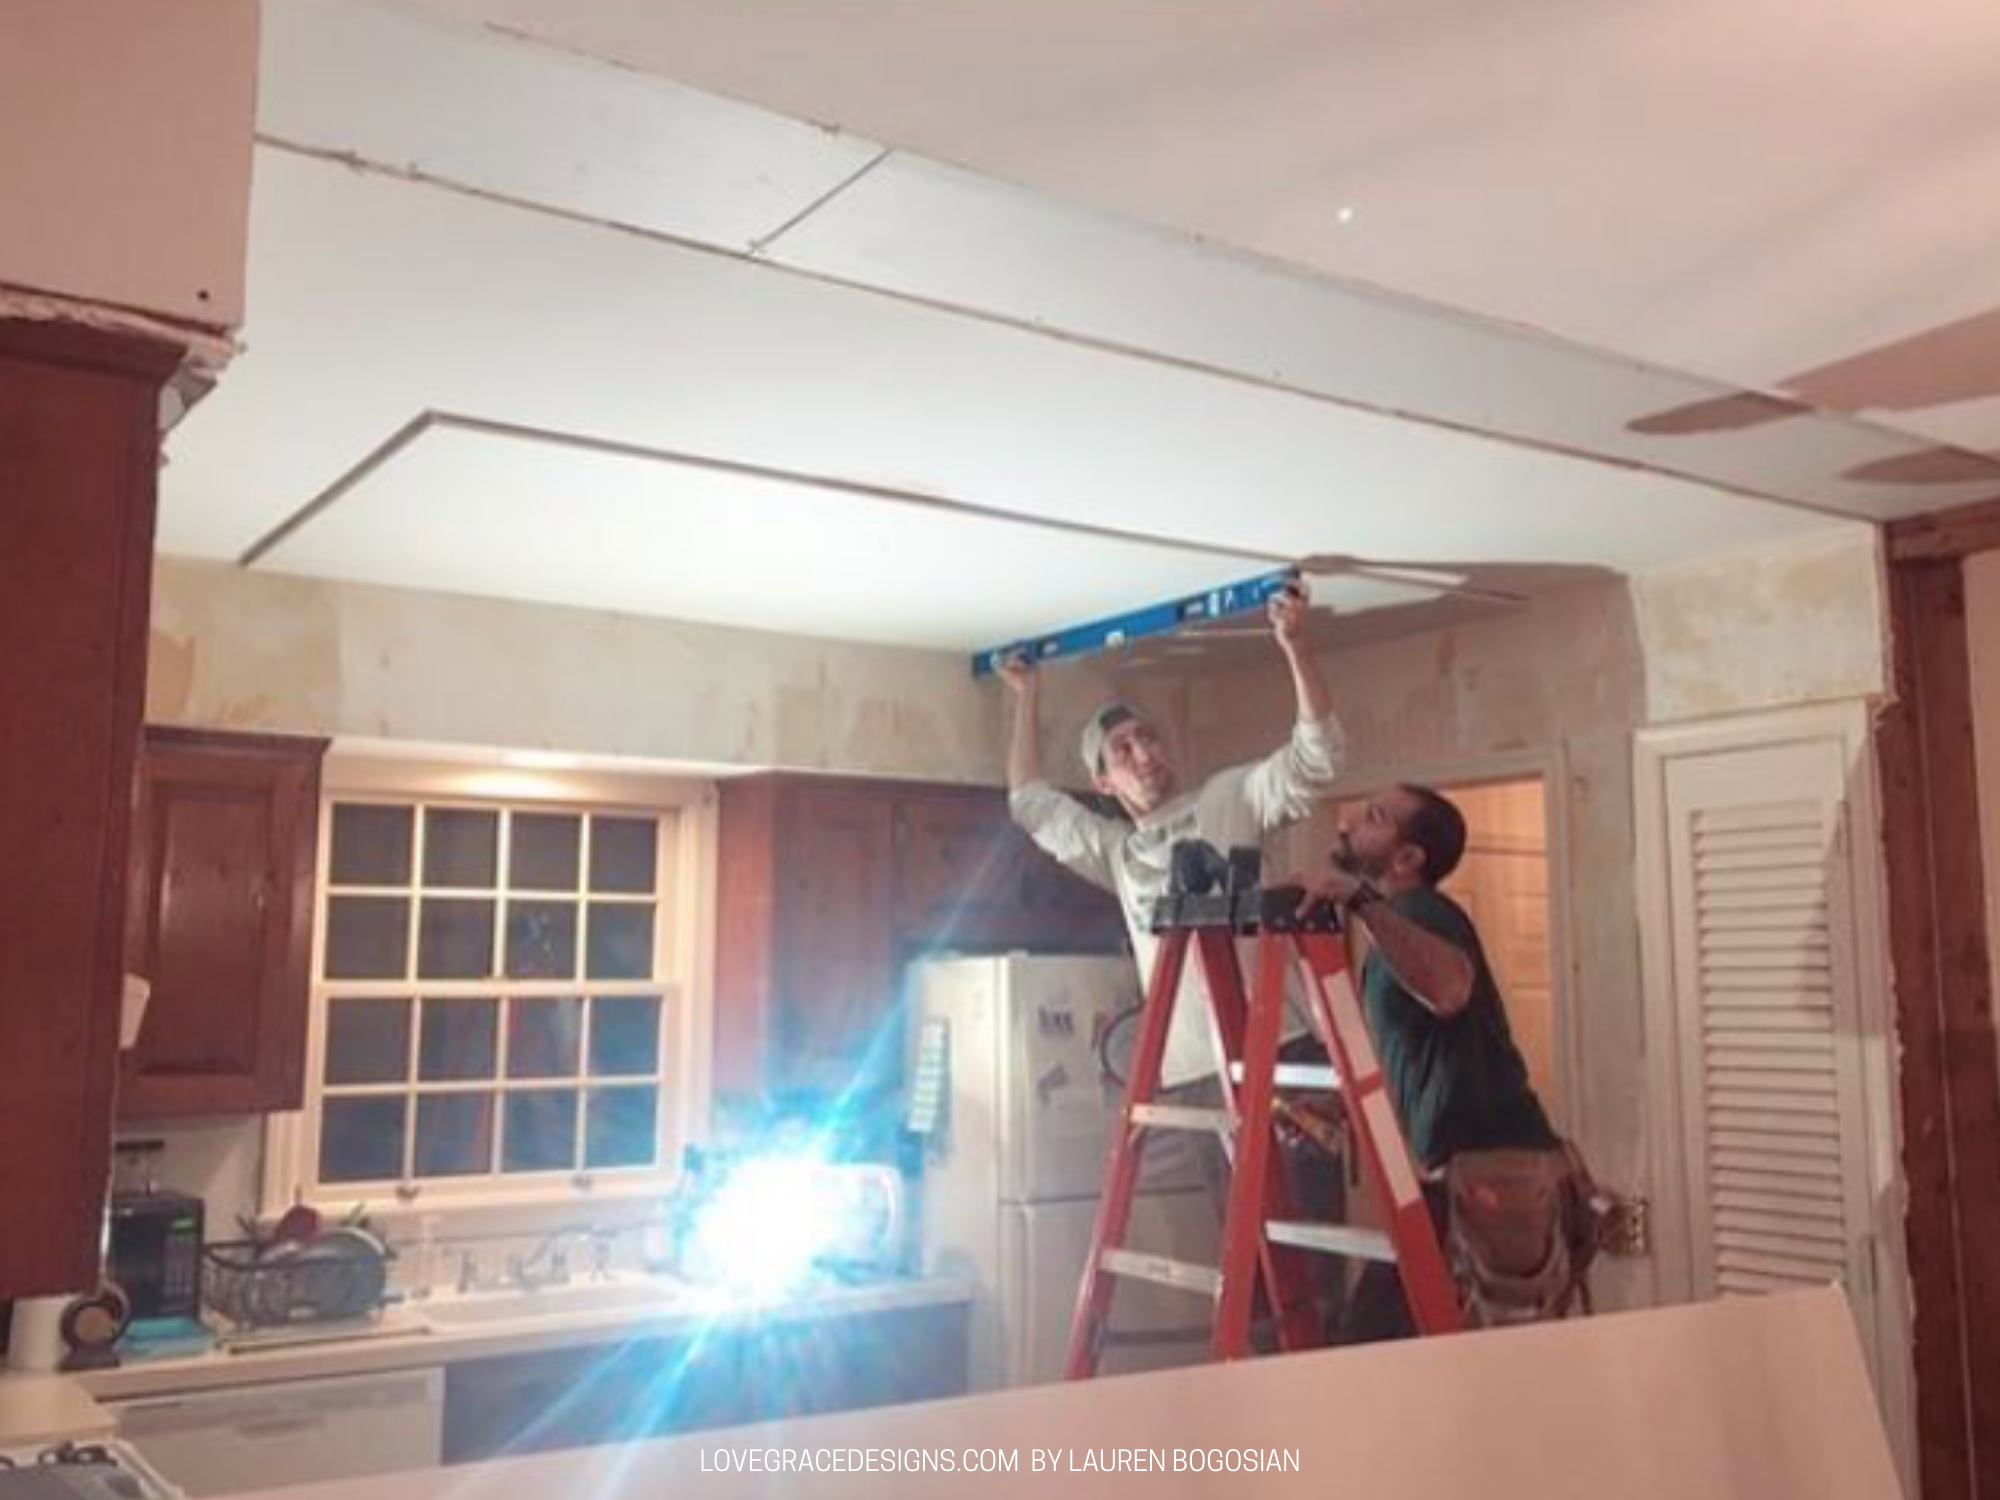
We removed the soffit just over the peninsula (there is still a soffit over the kitchen cabinets) and we quickly realized the ceilings on the right side in the kitchen and the left side over the breakfast table do not match. It seems like they put another piece of sheetrock in the breakfast area so the ceiling was slightly lower but when trying to connect the two sides, it would be an obvious difference. We think that there was wallpaper on the ceiling so that’s why it was sheetrocked again. The catch was, the sheetrock thickness they used it’s really a size anymore so there was no simple way to just put more on in the kitchen area. My brother helped us out with this and we had to get creative with installing new sheetrock.
By the time we finally finished installing the new sheetrock we were so over this project that we got a handyman to tape and spackle. He spackled it in a couple hours where that probably would’ve taken me days to perfect.
Recessed Lighting and New Lighting
Now that the soffit was removed and the ceiling was finally set, we could get recessed lighting installed in the kitchen and in the living room. We used an electrician for this which I highly recommend.
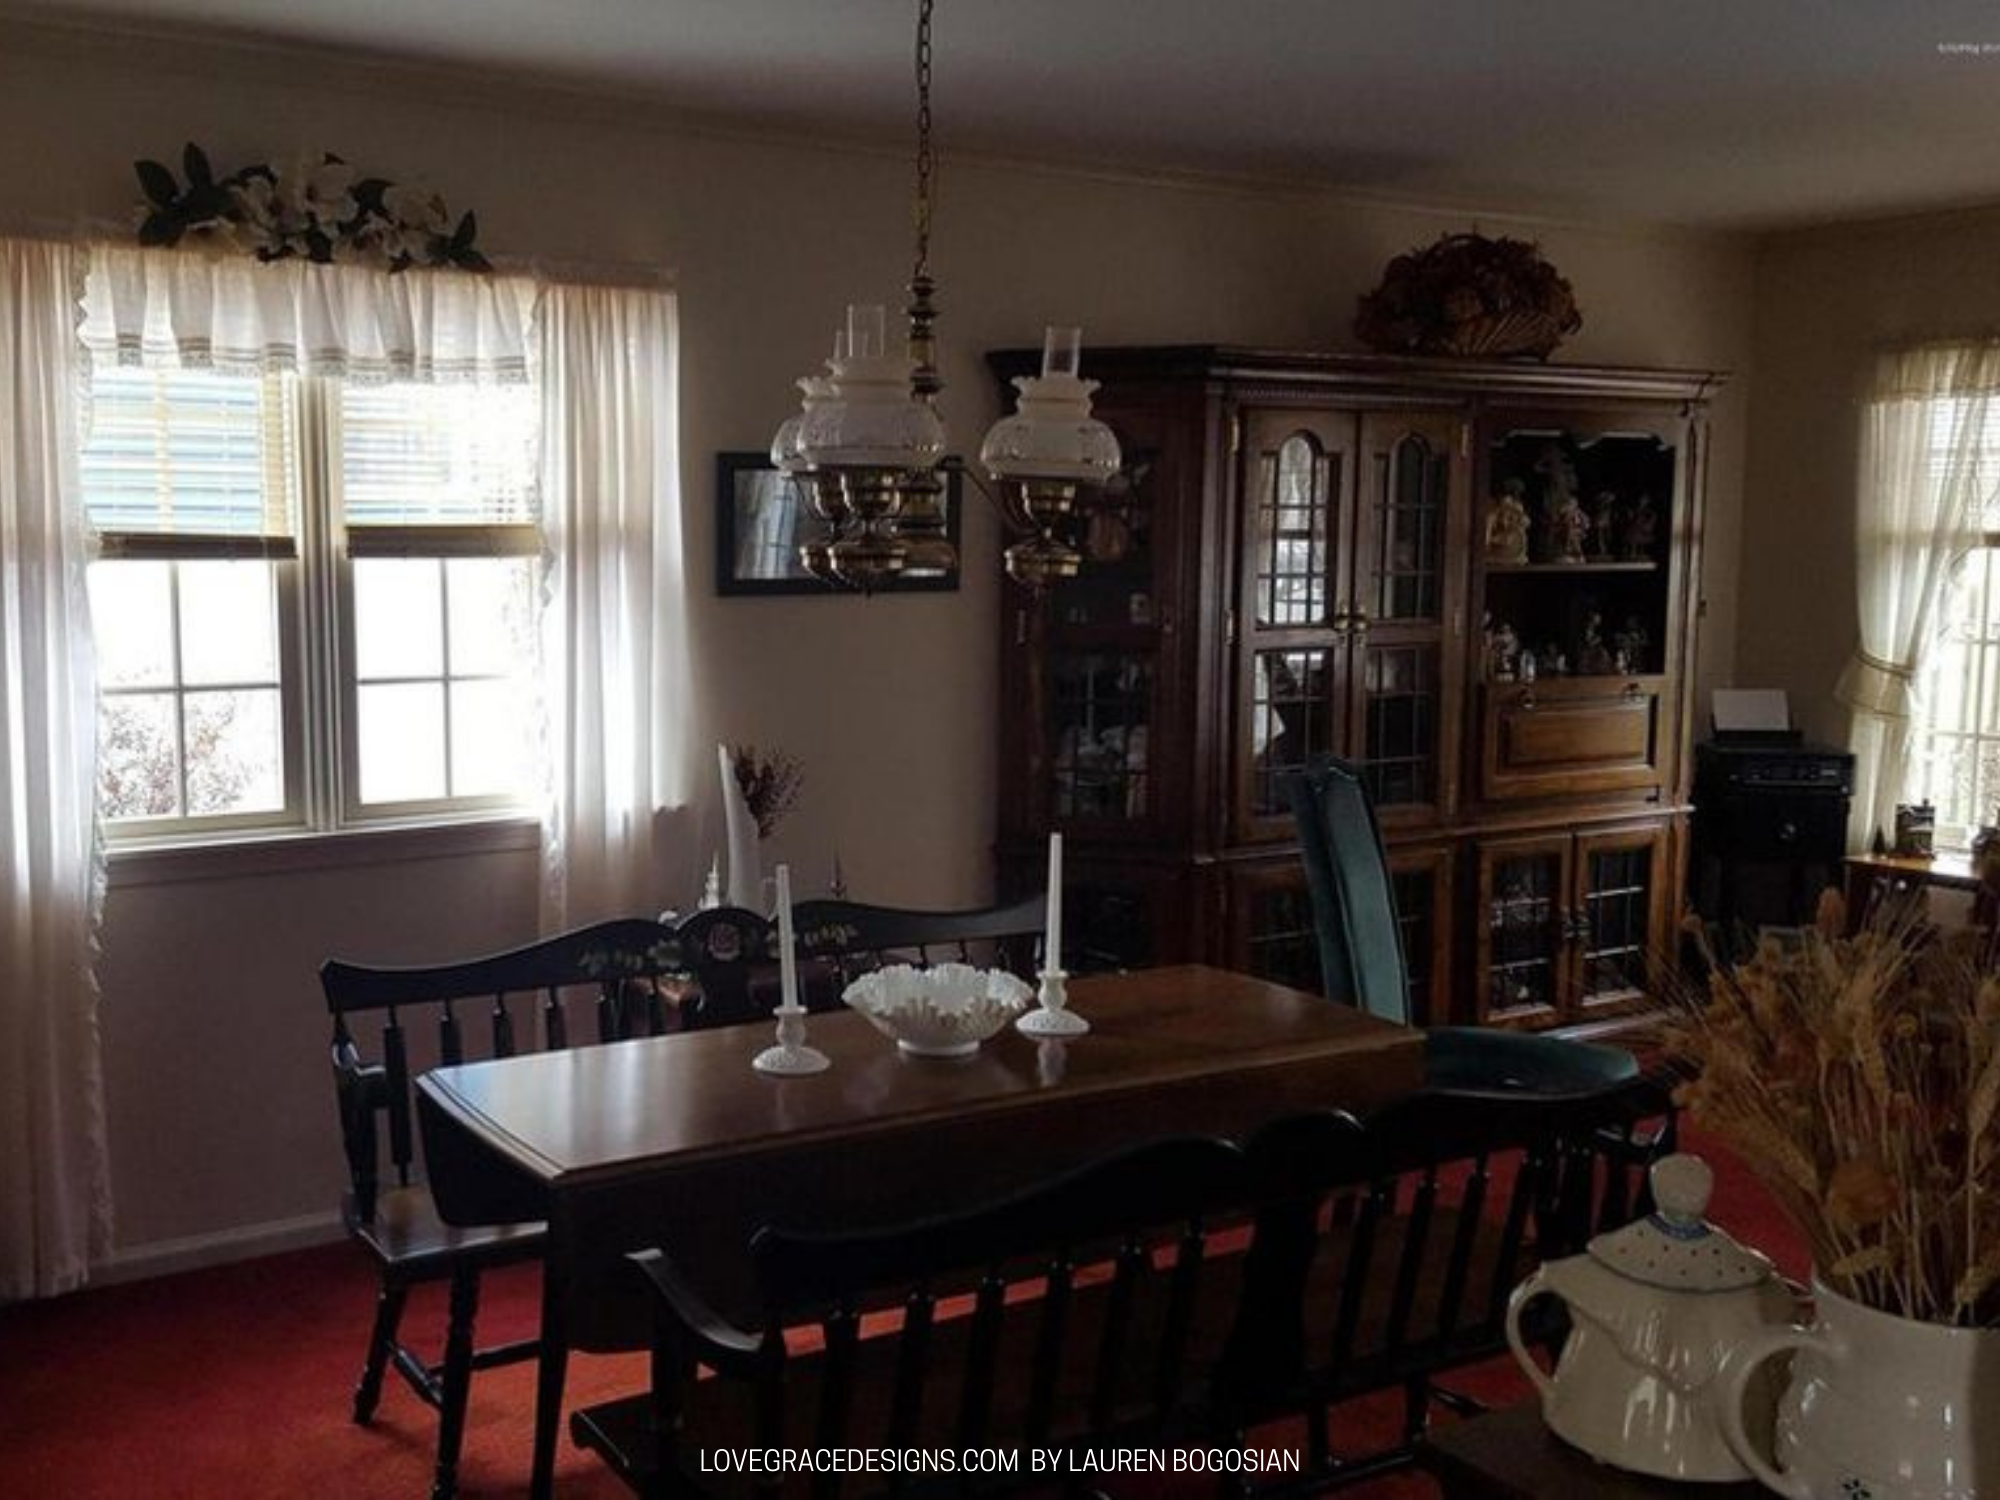
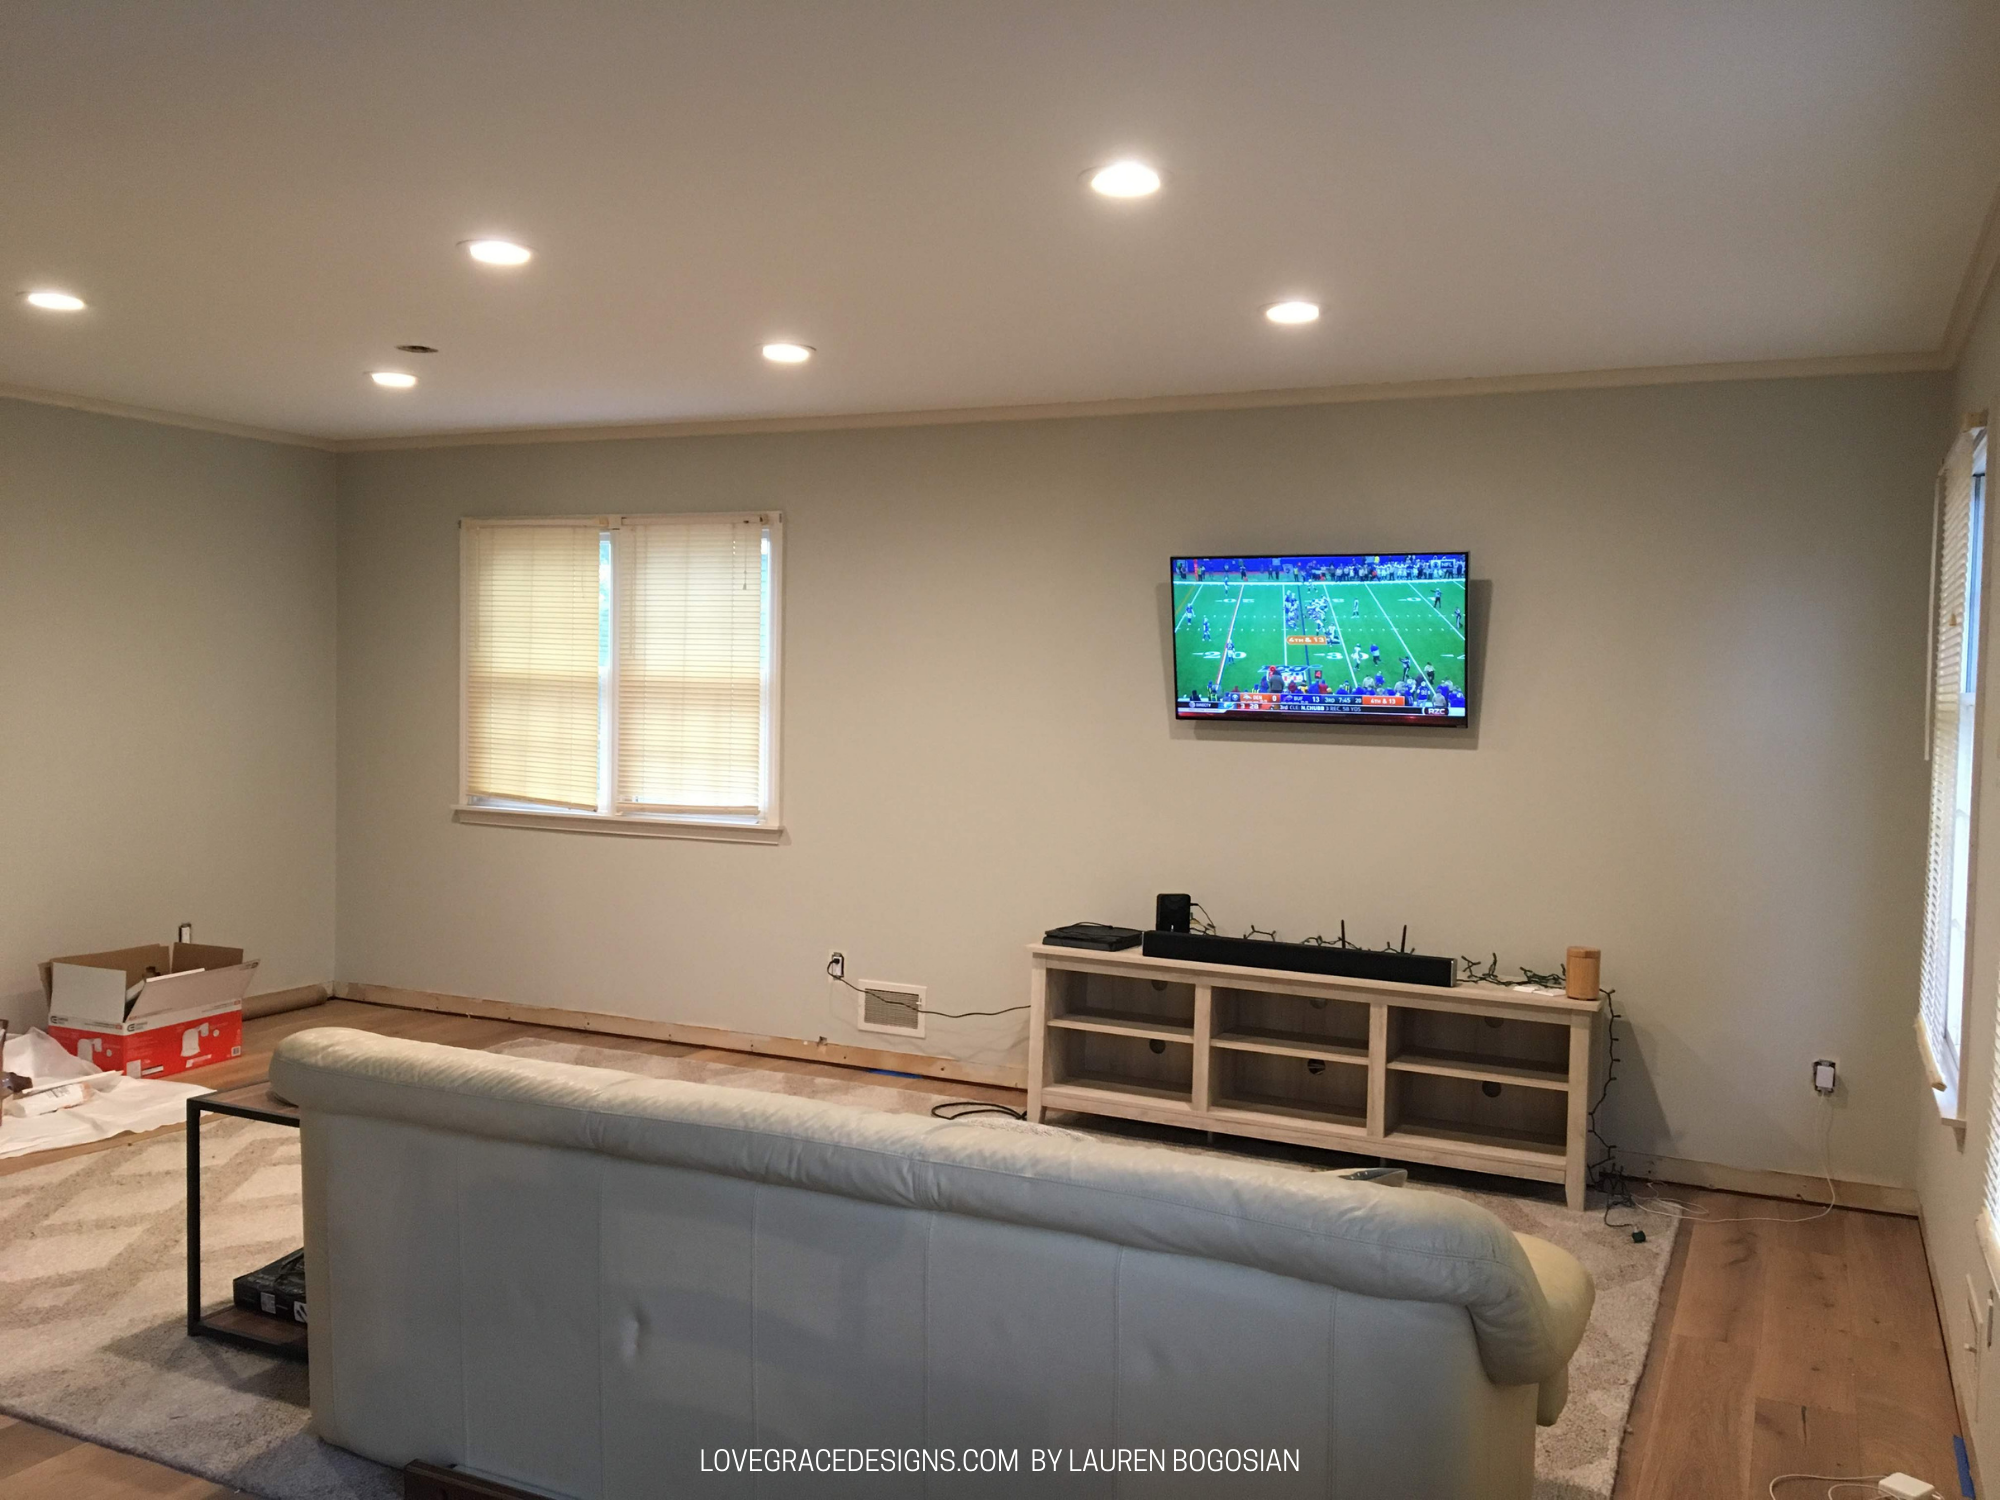
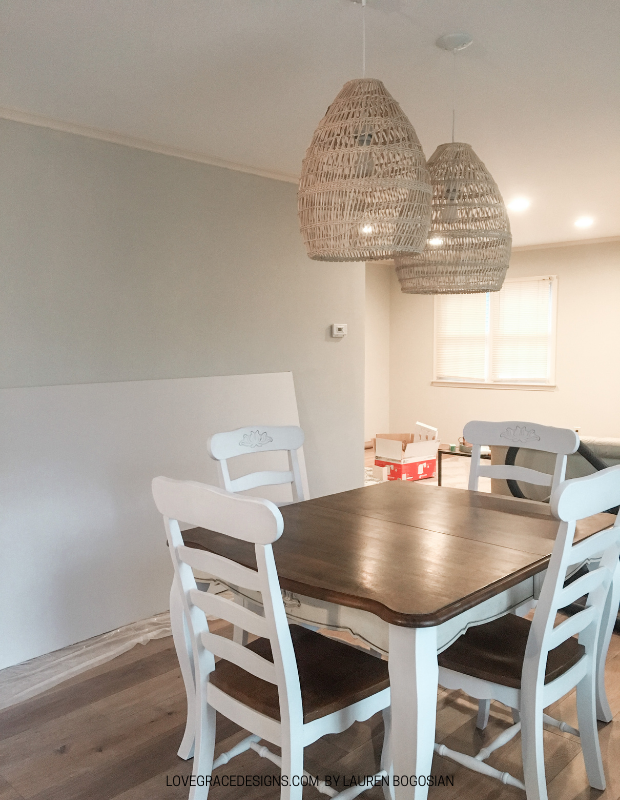
Since we flip flopped what they had used as their living room and dining room, the dining room light in our now living room had to be removed and the lights we wanted to use for our dining room had to be installed since there was no ceiling light source to begin with.
We used an electrician for all of this which I highly recommend. DIYing electric work such as this is not the smartest unless you really, really know what you’re doing.
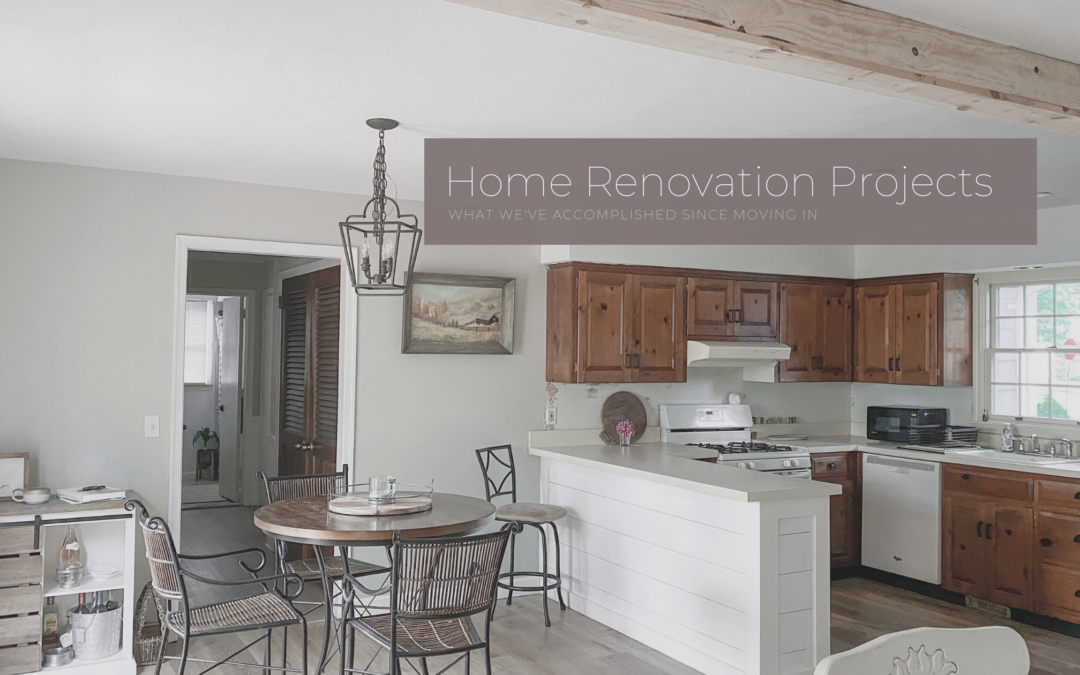
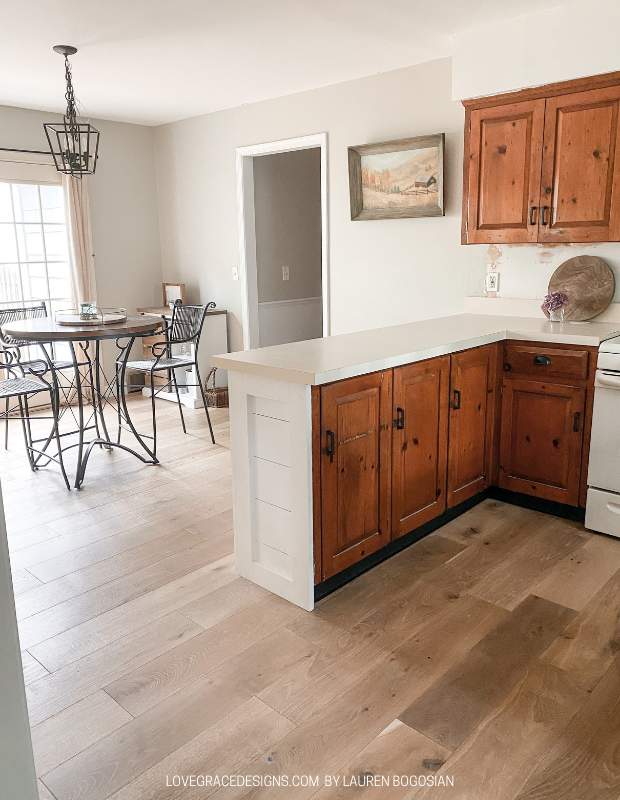
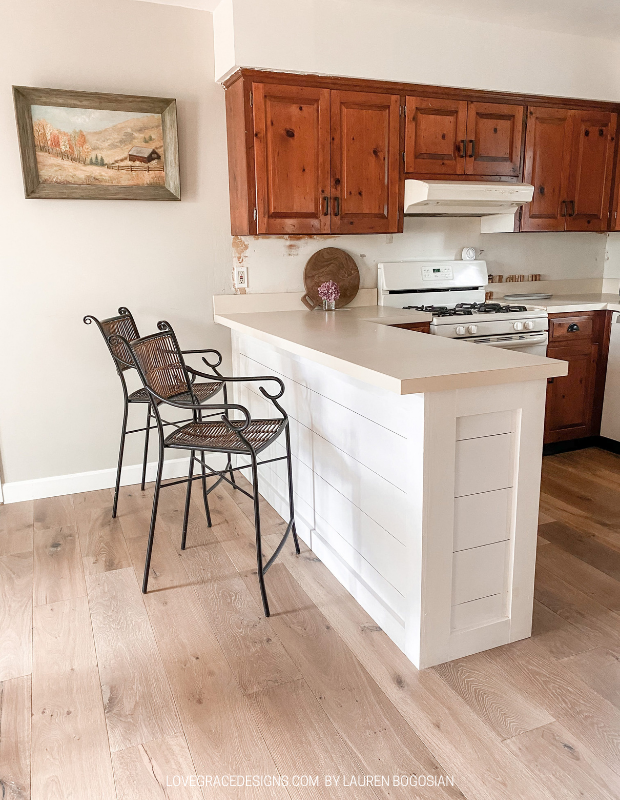
DIY Shiplap Kitchen Peninsula
This was one of my favorite DIY projects to do! I will have a detailed DIY how-to on this one day and it’s defintiely a project that can easily be done! I think this took about 2 days (1 weekend) to cut, nail, and caulk all of the pieces and then another day to paint it.
New Baseboard Trim
We needed to cut and nail all new trim throughout the main living areas. That was fully completed on December 13, 2019. We were having my 30th birthday/house warming party that day and that was one of the final updates we had to complete that day which is why I remember!
DIY Box Beams
This was one DIY project that took a long time but the look has paid off big time. I envisioned this the moment we walked into the house to look at it.
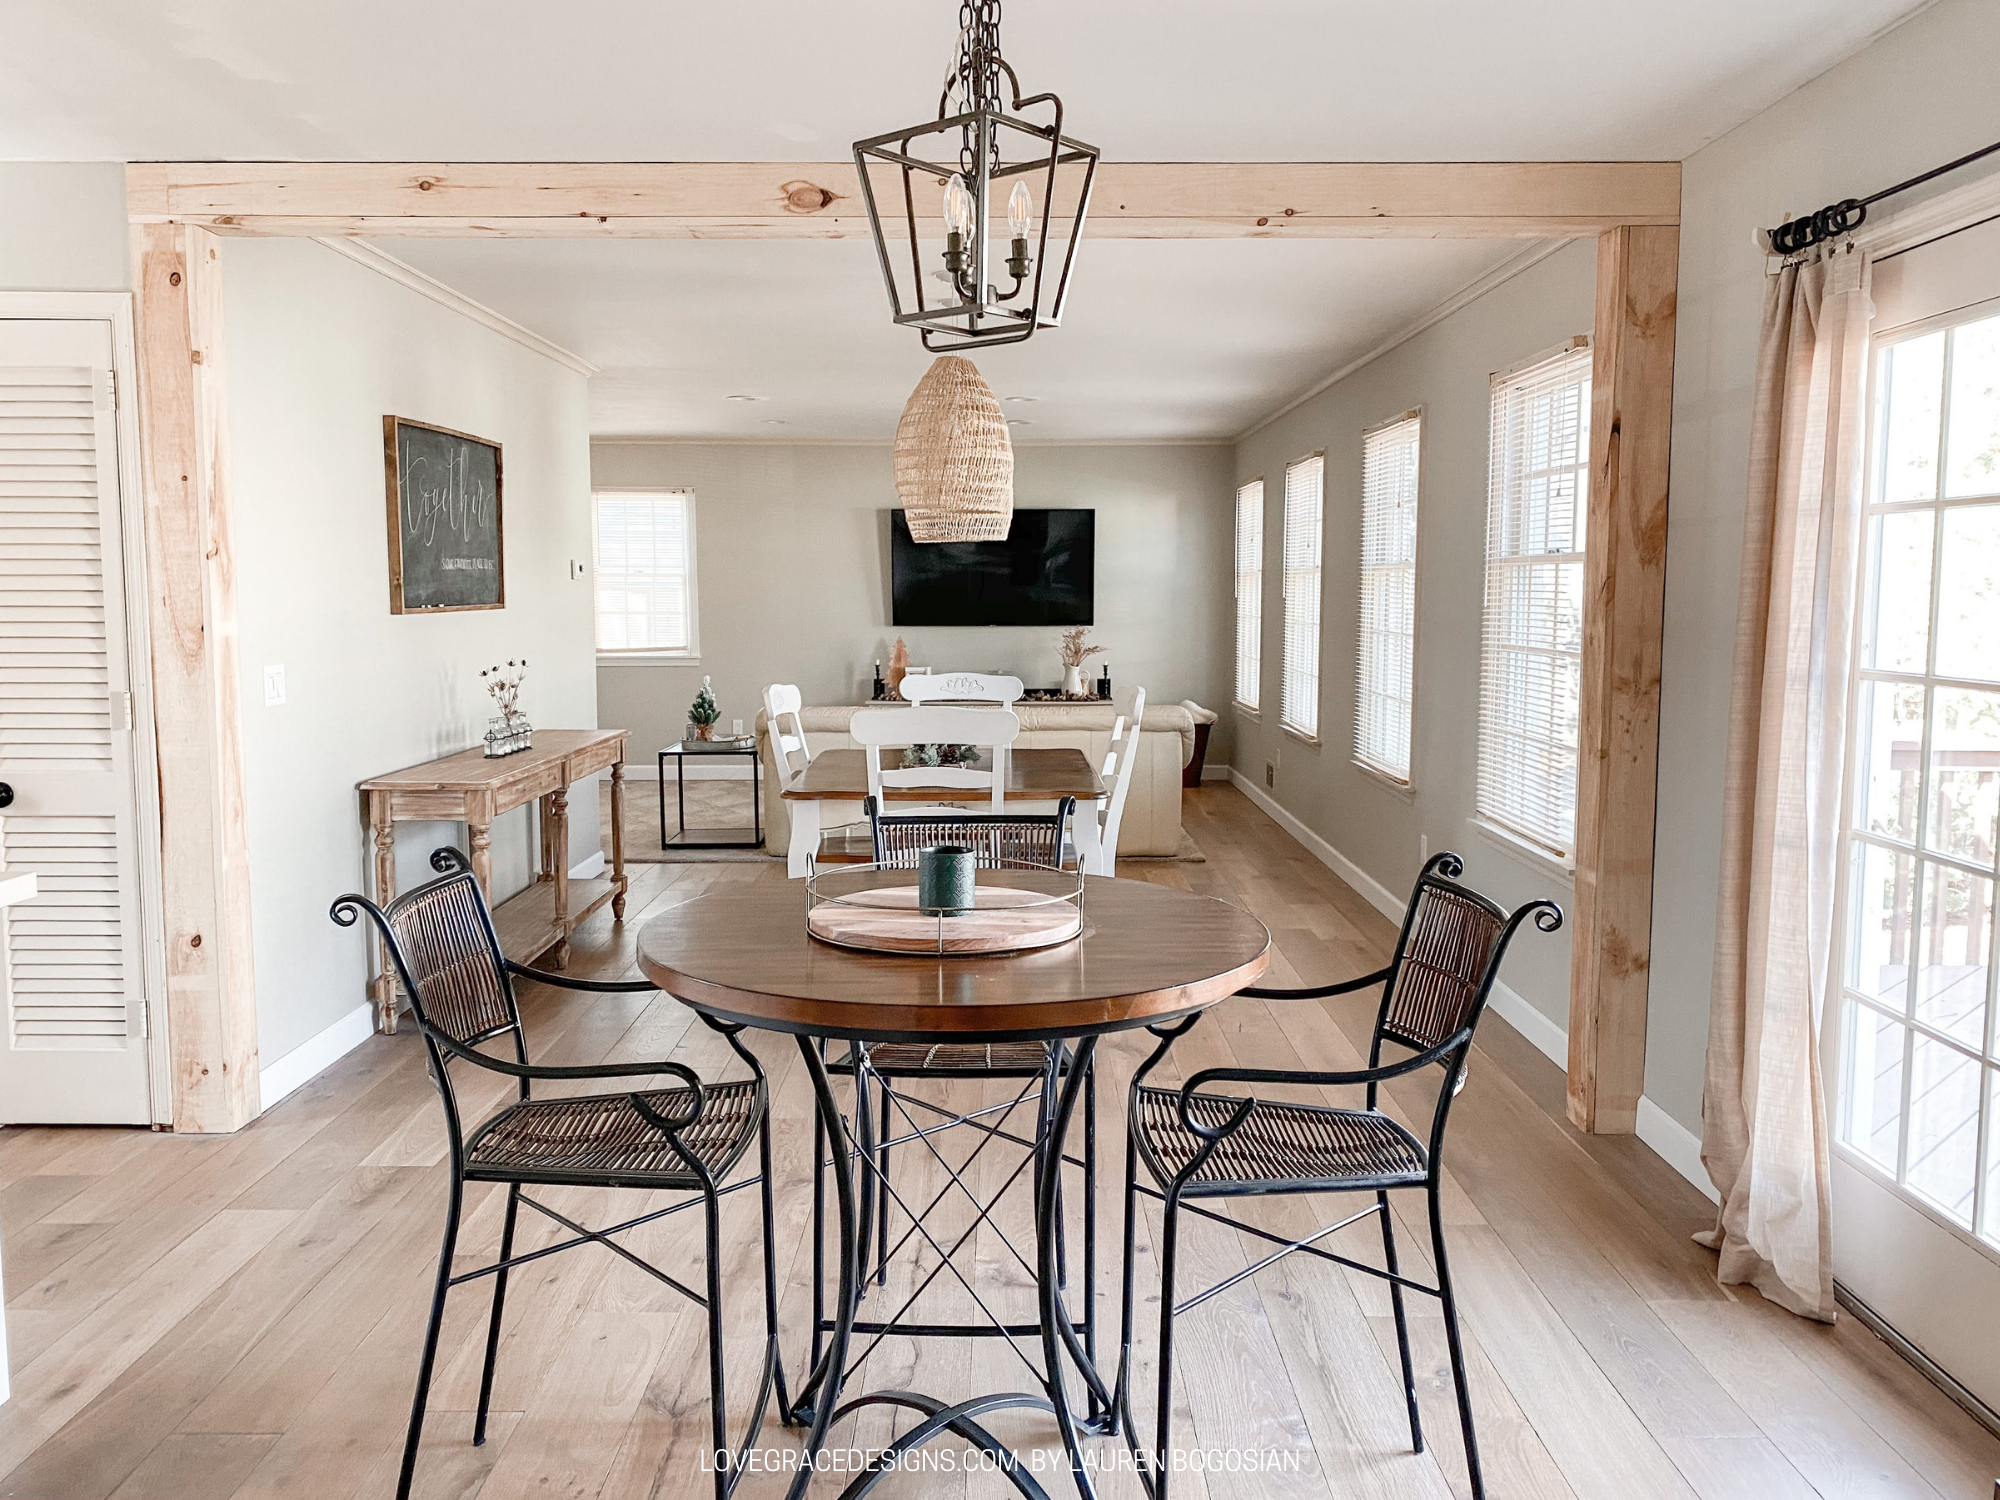
The walls of this house, like many older homes, are not even and on top of that, the ceiling heights were slightly different on either side. In wood working, those slight differences can be a huge factor. We worked with it and the fact that these were supposed to look rustic and natural helped a bit. I will also have a detailed DIY how to on these one day but for now, just know this was not 1, 2, 3.
2020
After my birthday in December, we took a couple months off from doing house work to enjoy what we had accomplished and actually have some weekends to ourselves. I was training for a half marathon in Disney World which was in February 2020 so we figured after that we could start some more home projects. Then COVID hit and we were stuck home.
You’d think we would have gone head first into more renovation work but we actually slowly started to get back into it. I began purchasing more furniture and decor pieces for the house since we really didn’t have too much and honestly tried to enjoy the slower pace of life.
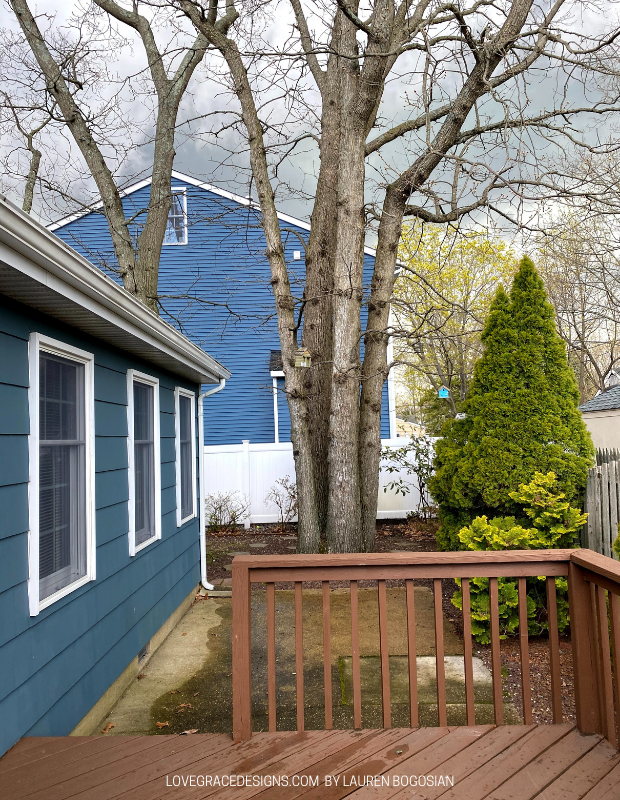
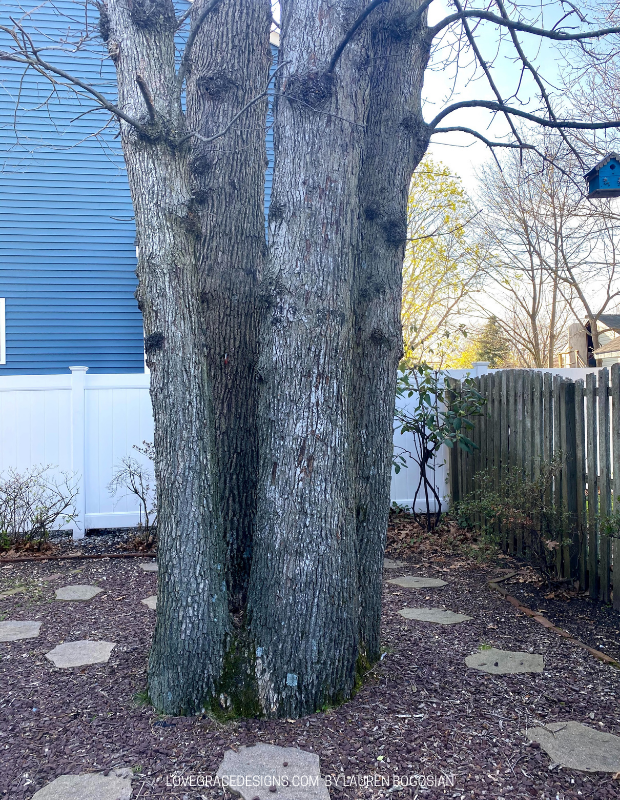
Tree Removal
In April, we had a huge tree in our backyard removed. It was one giant stump with 4 full size trees and it was smack in the middle of the biggest area of our backyard.
We got a company to cut down that one giant tree and grind the stump.
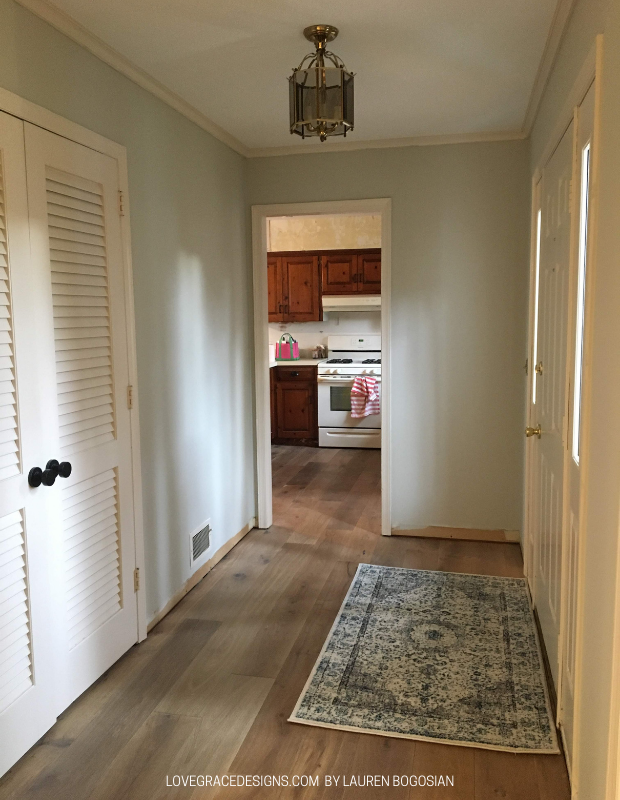
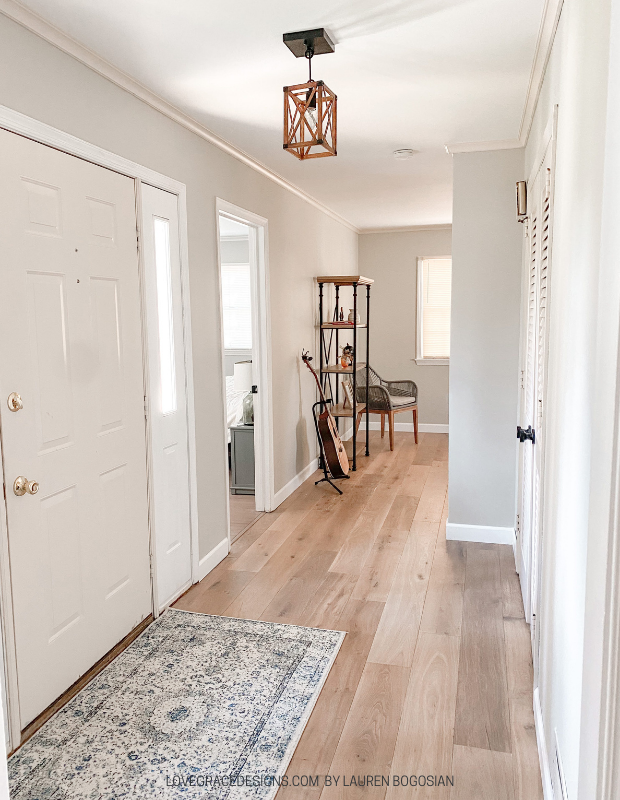
New Entry Light
One of the things for the house that I bought in quarantine was a new light for our entryway and Steve was able to swap out the old one and put in the new one. Easy peasy update.

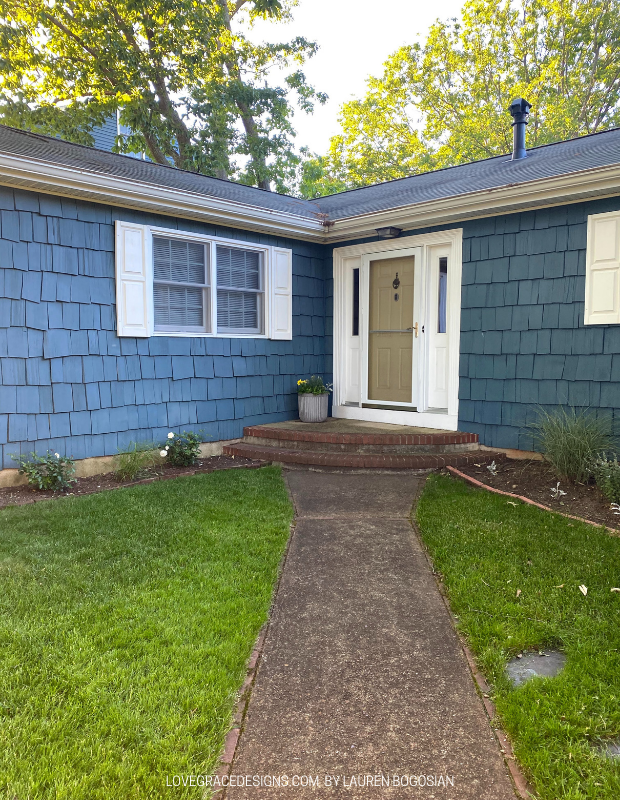
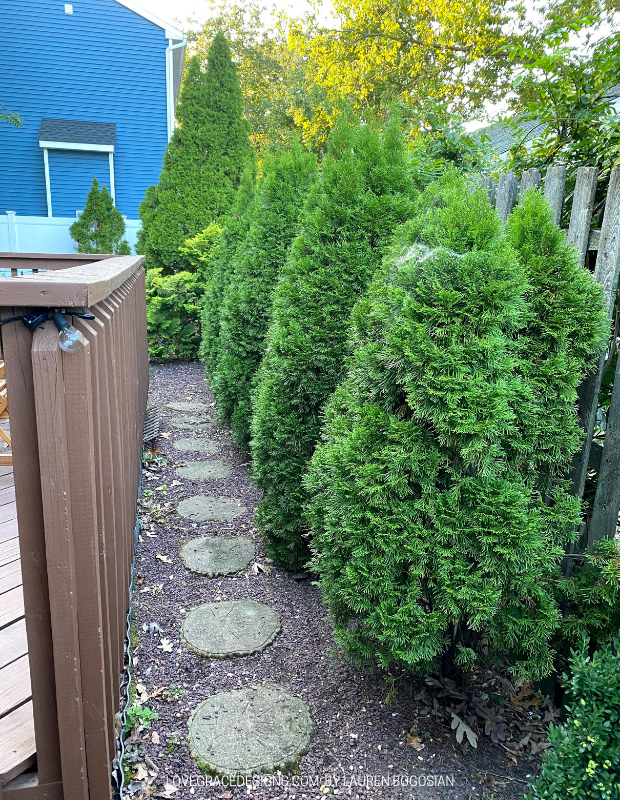
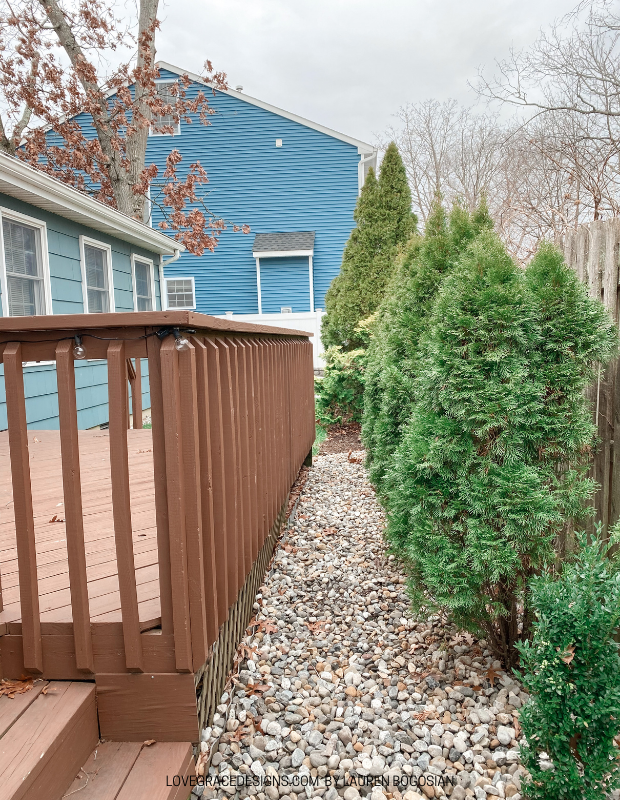
Front Yard Landscaping
In May, the weather started getting nicer and I wanted to do more with some of our landscaping. We have a lot of bushes all around our property but a lot of them are not really full and just look like a bunch of twigs or do nothing to add to curb appeal.
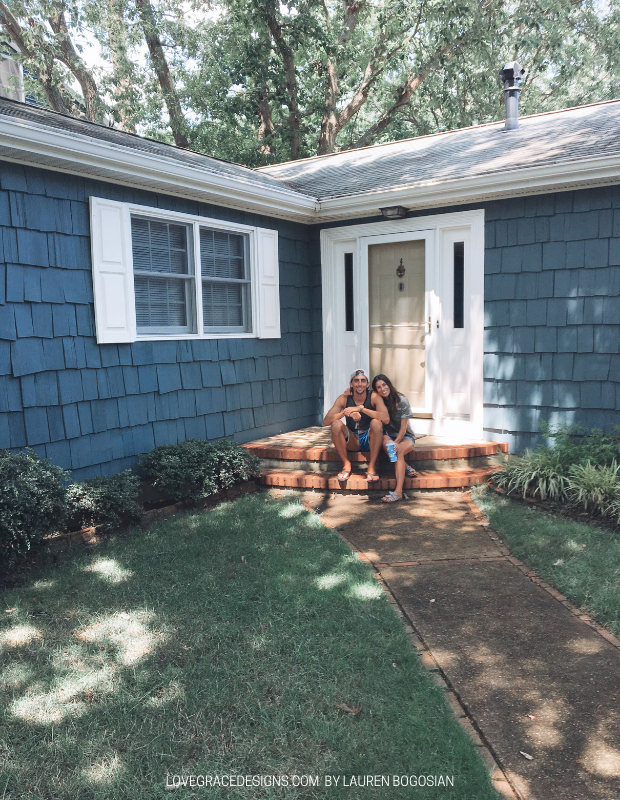
I pulled all of the bushes and plants out around our front porch and added iceberg roses and some sea grass in. My dad calls sea grass fancy weeds so I now call them fancy weeds too (LOL). They don’t get a lot of sun and the soil doesn’t drain that well so I think I killed them all already…oops.

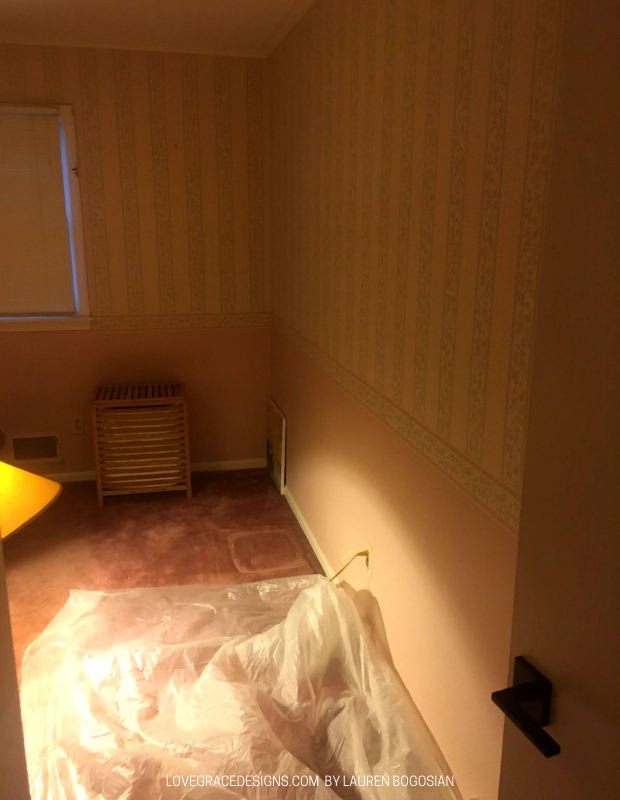
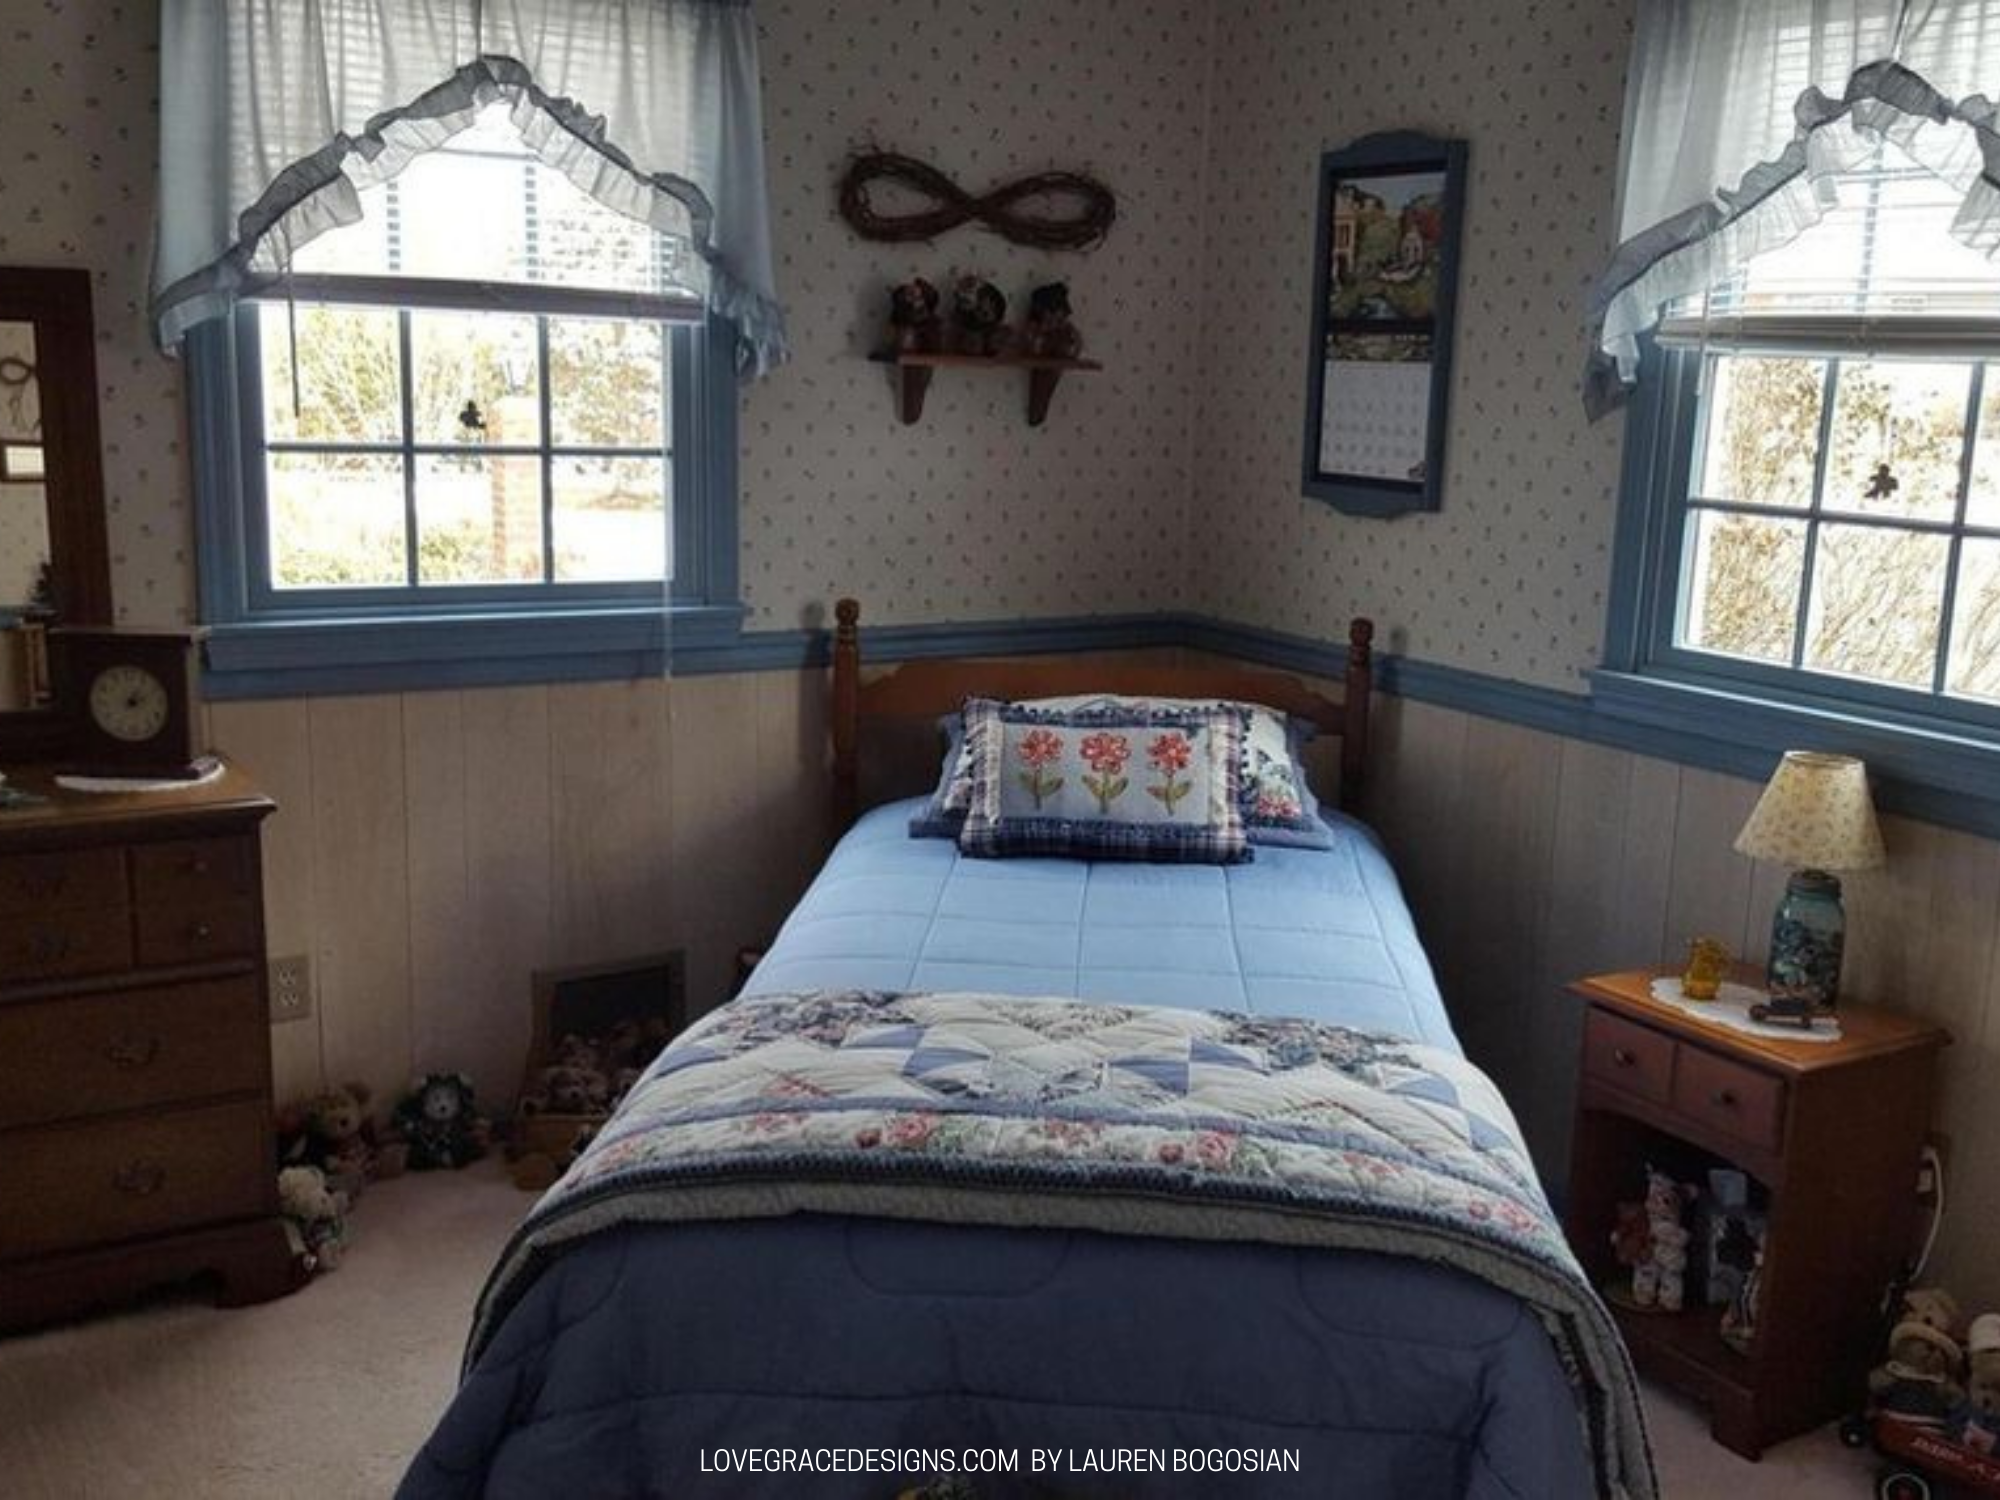
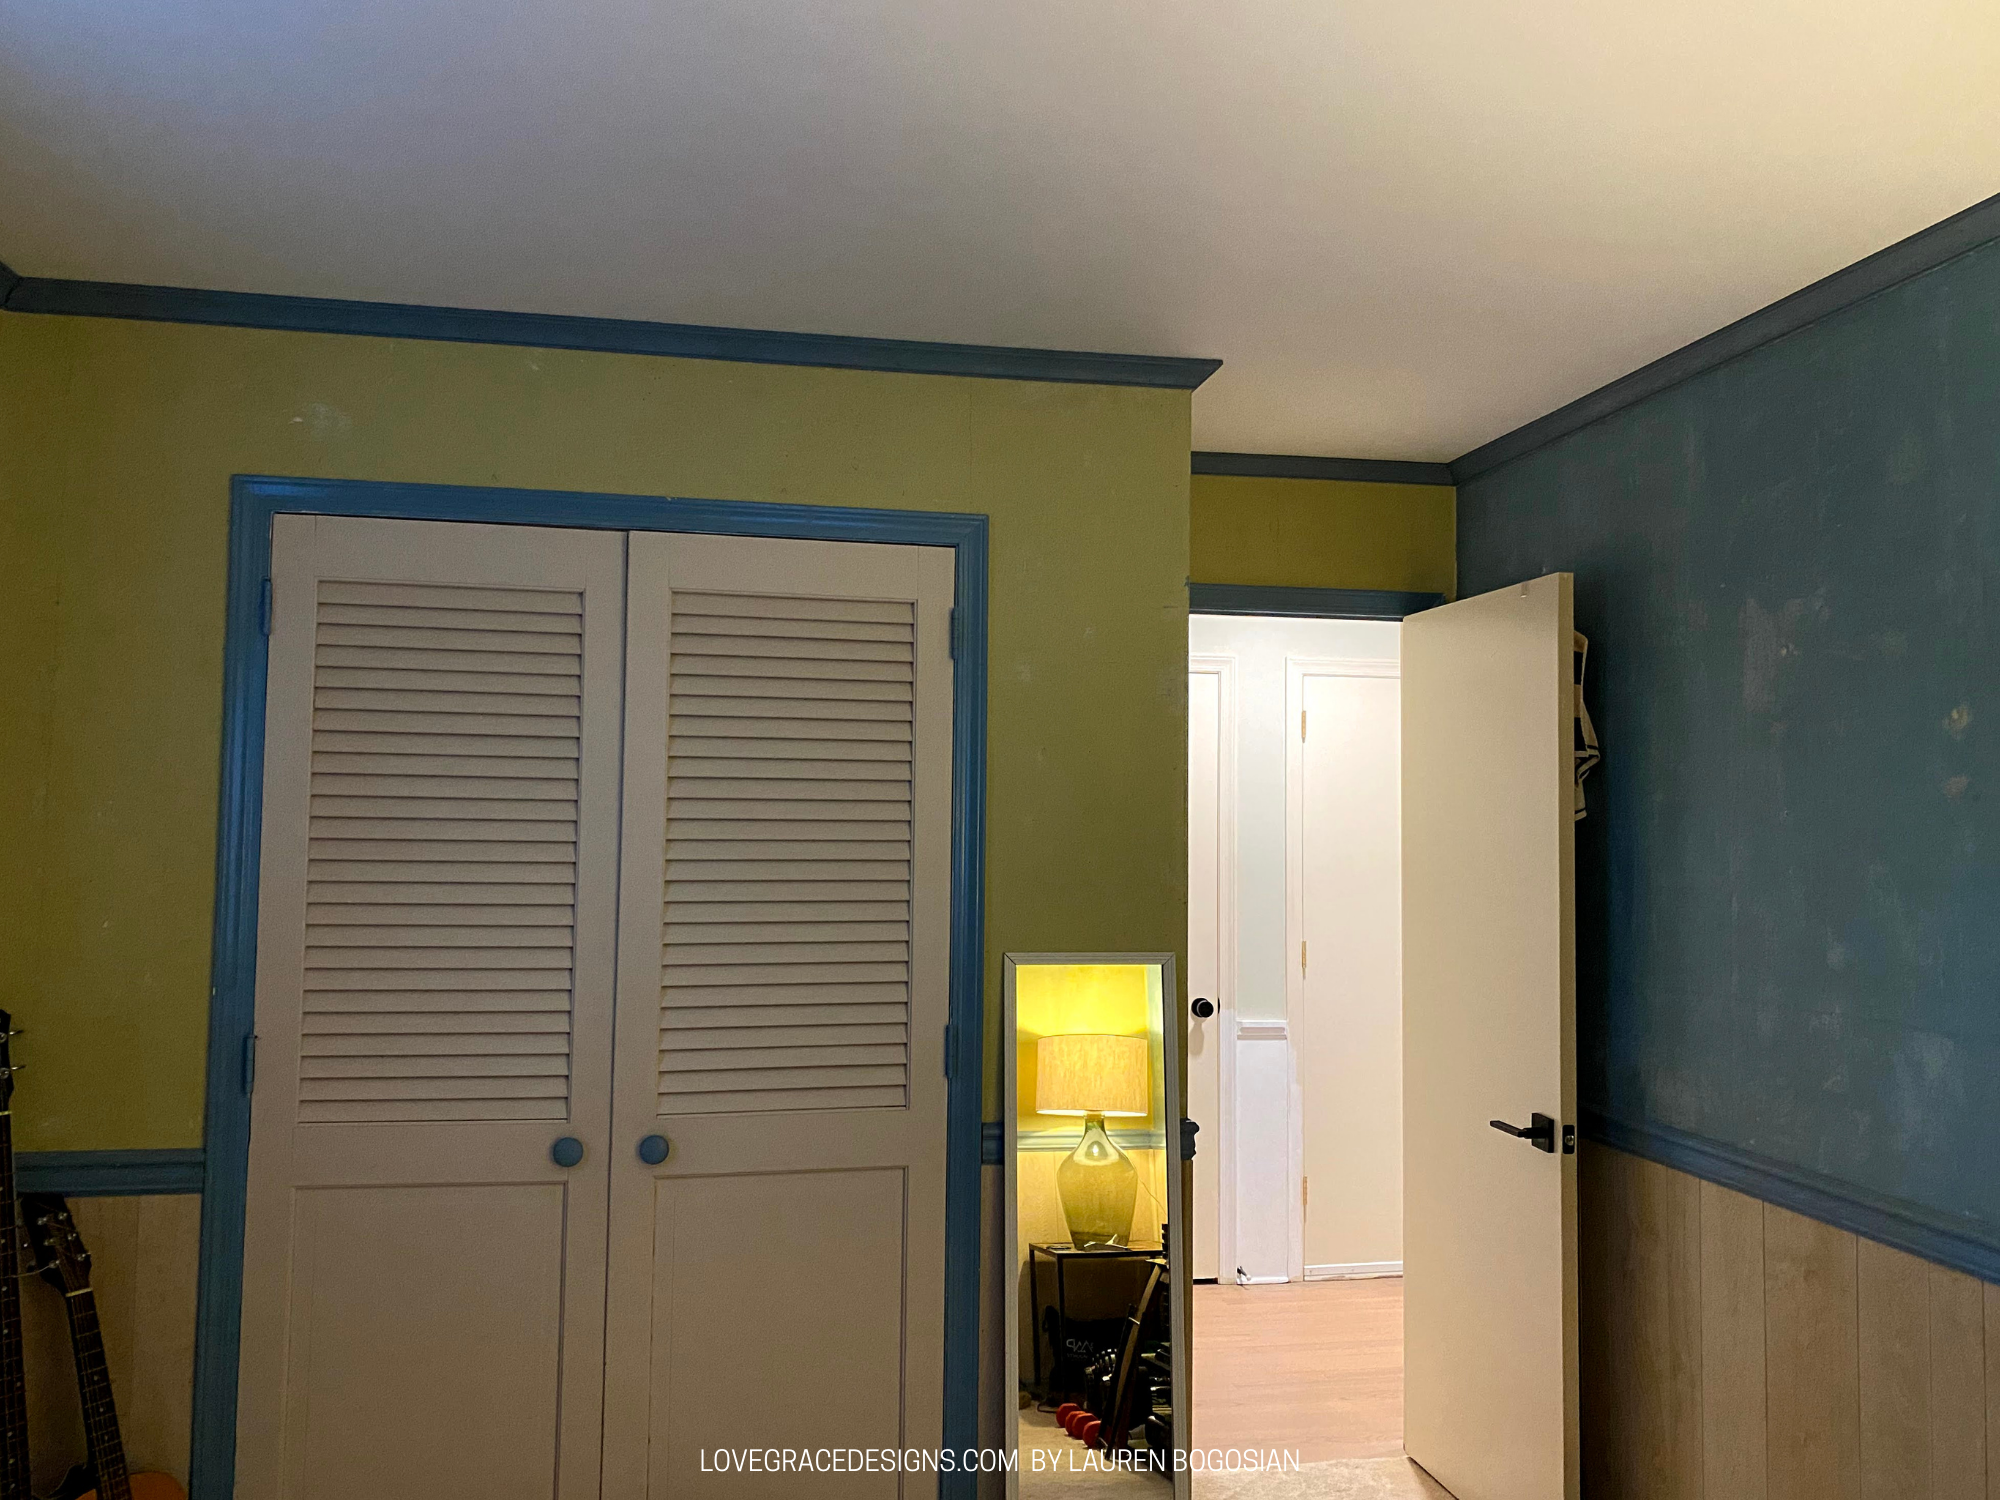
Wallpaper Removal & Paint – Pink Room
We (Steve) started removing wall paper in the ‘pink room’ at some point in the spring or summer (quarantine blurred together). Our two other bedrooms still had carpeting and wallpaper. One had pink carpet and pink wallpaper. The other was beige carpet but blue trim and blue/cream wall paper. So we appropriately named them the pink room and the blue room…clever, I know.
This was the same ordeal as the rest of the house. Once the wallpaper was removed, we had to spackle and prep the walls to be painted. I ordered some paint samples and once the walls were fully prepped we tested them out to then paint. This was done over time and in no rush at all.
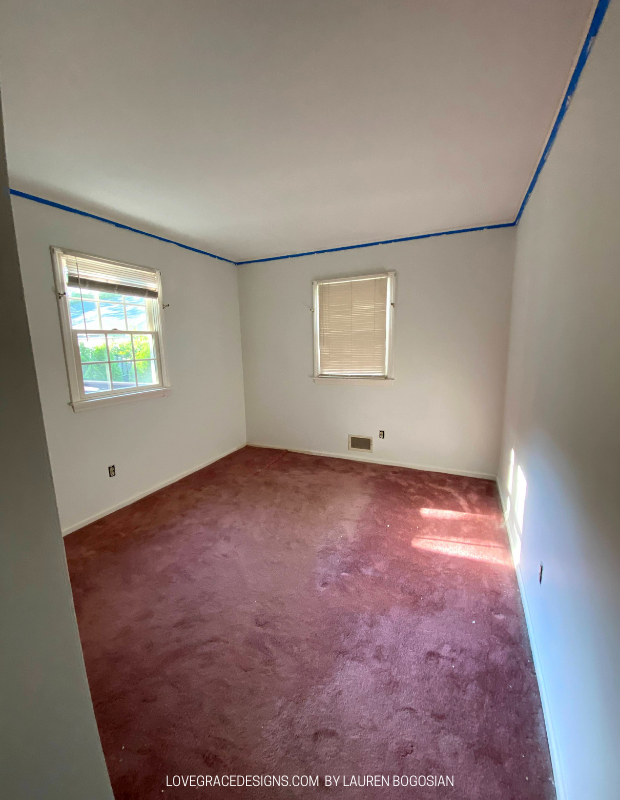
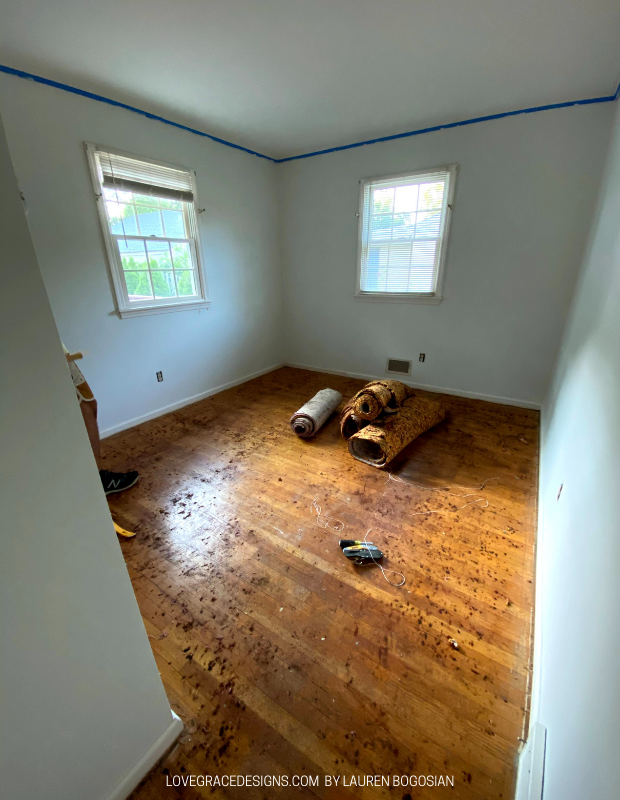
Carpet Removal & Refinished Floors – Pink Room
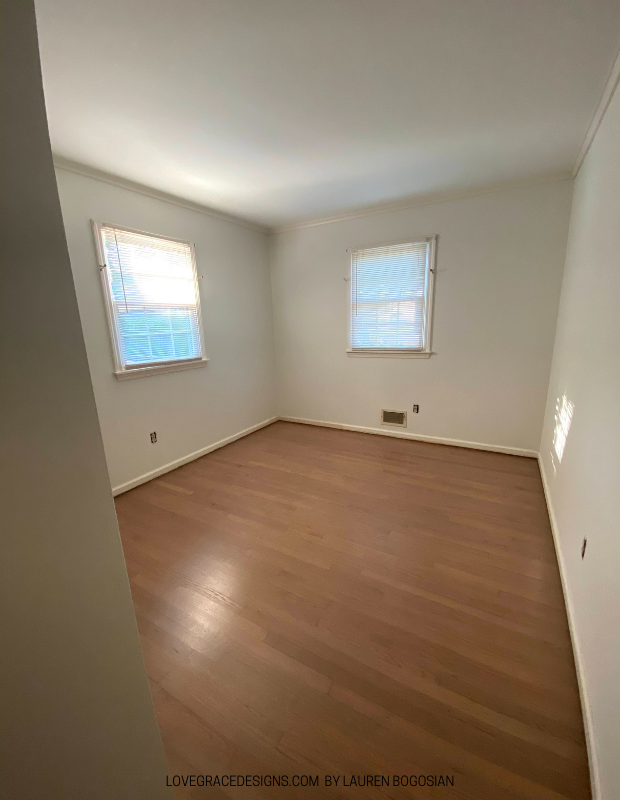
After we painted the pink room, we removed the carpet ourselves. We felt comfortable about August timeframe to have someone in our house to refinish the wood floors under that carpet. They did this while we were at work and we found out when we got home that they stained them the wrong color. So we had to wait another week for them to come back and sand and refinish the floors correctly this time.
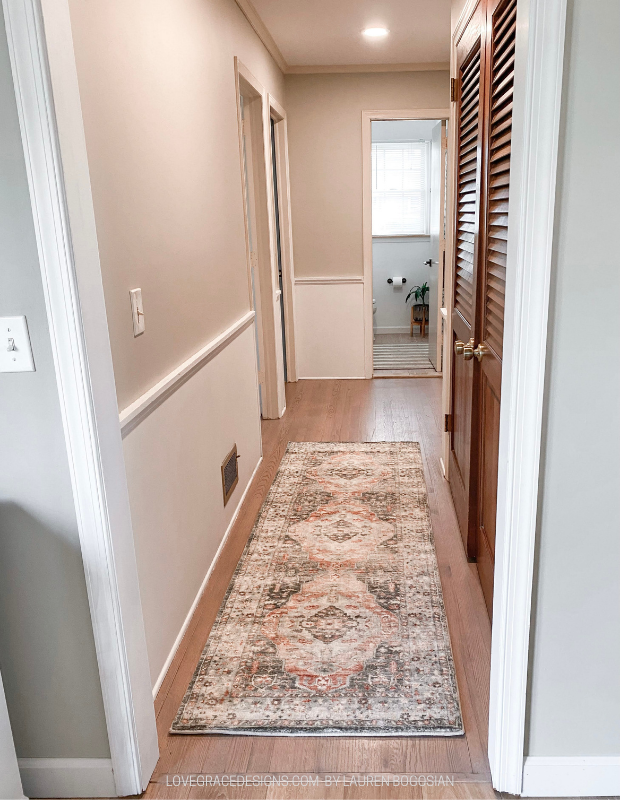
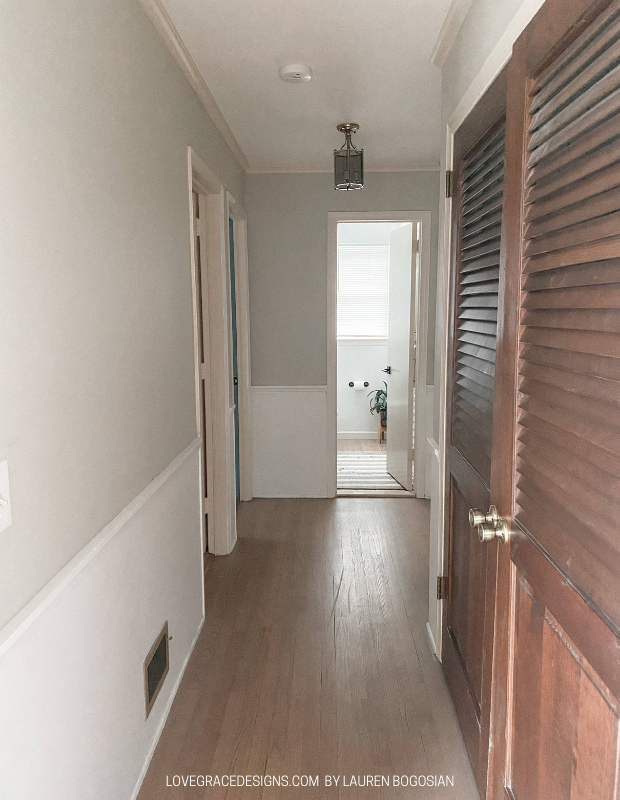
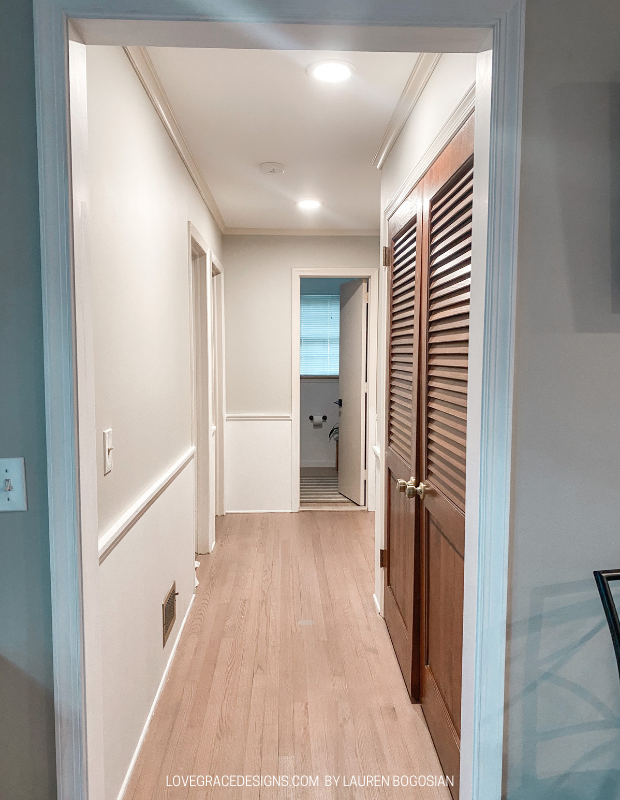
Hallway Recessed Lighting
We had our electrician come back to install recessed lighting in our hallway and it made such a huge difference. The old brass light fixture was out and the light the recessed lighting gives off is SO much better.
Hall Bathroom Updates
This is the bathroom that the original homeowners redid very nicely before they put it on the market so there wasn’t too much that needed to be done. They primed the walls so all we did was paint them white and then we replaced the mirror they had with a larger green framed one that was more my style that my cousin was actually getting rid of.
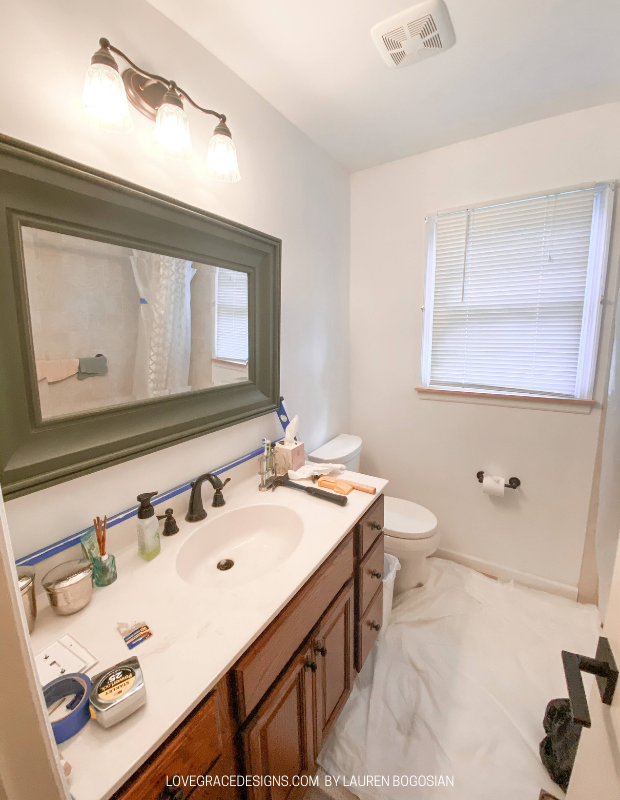
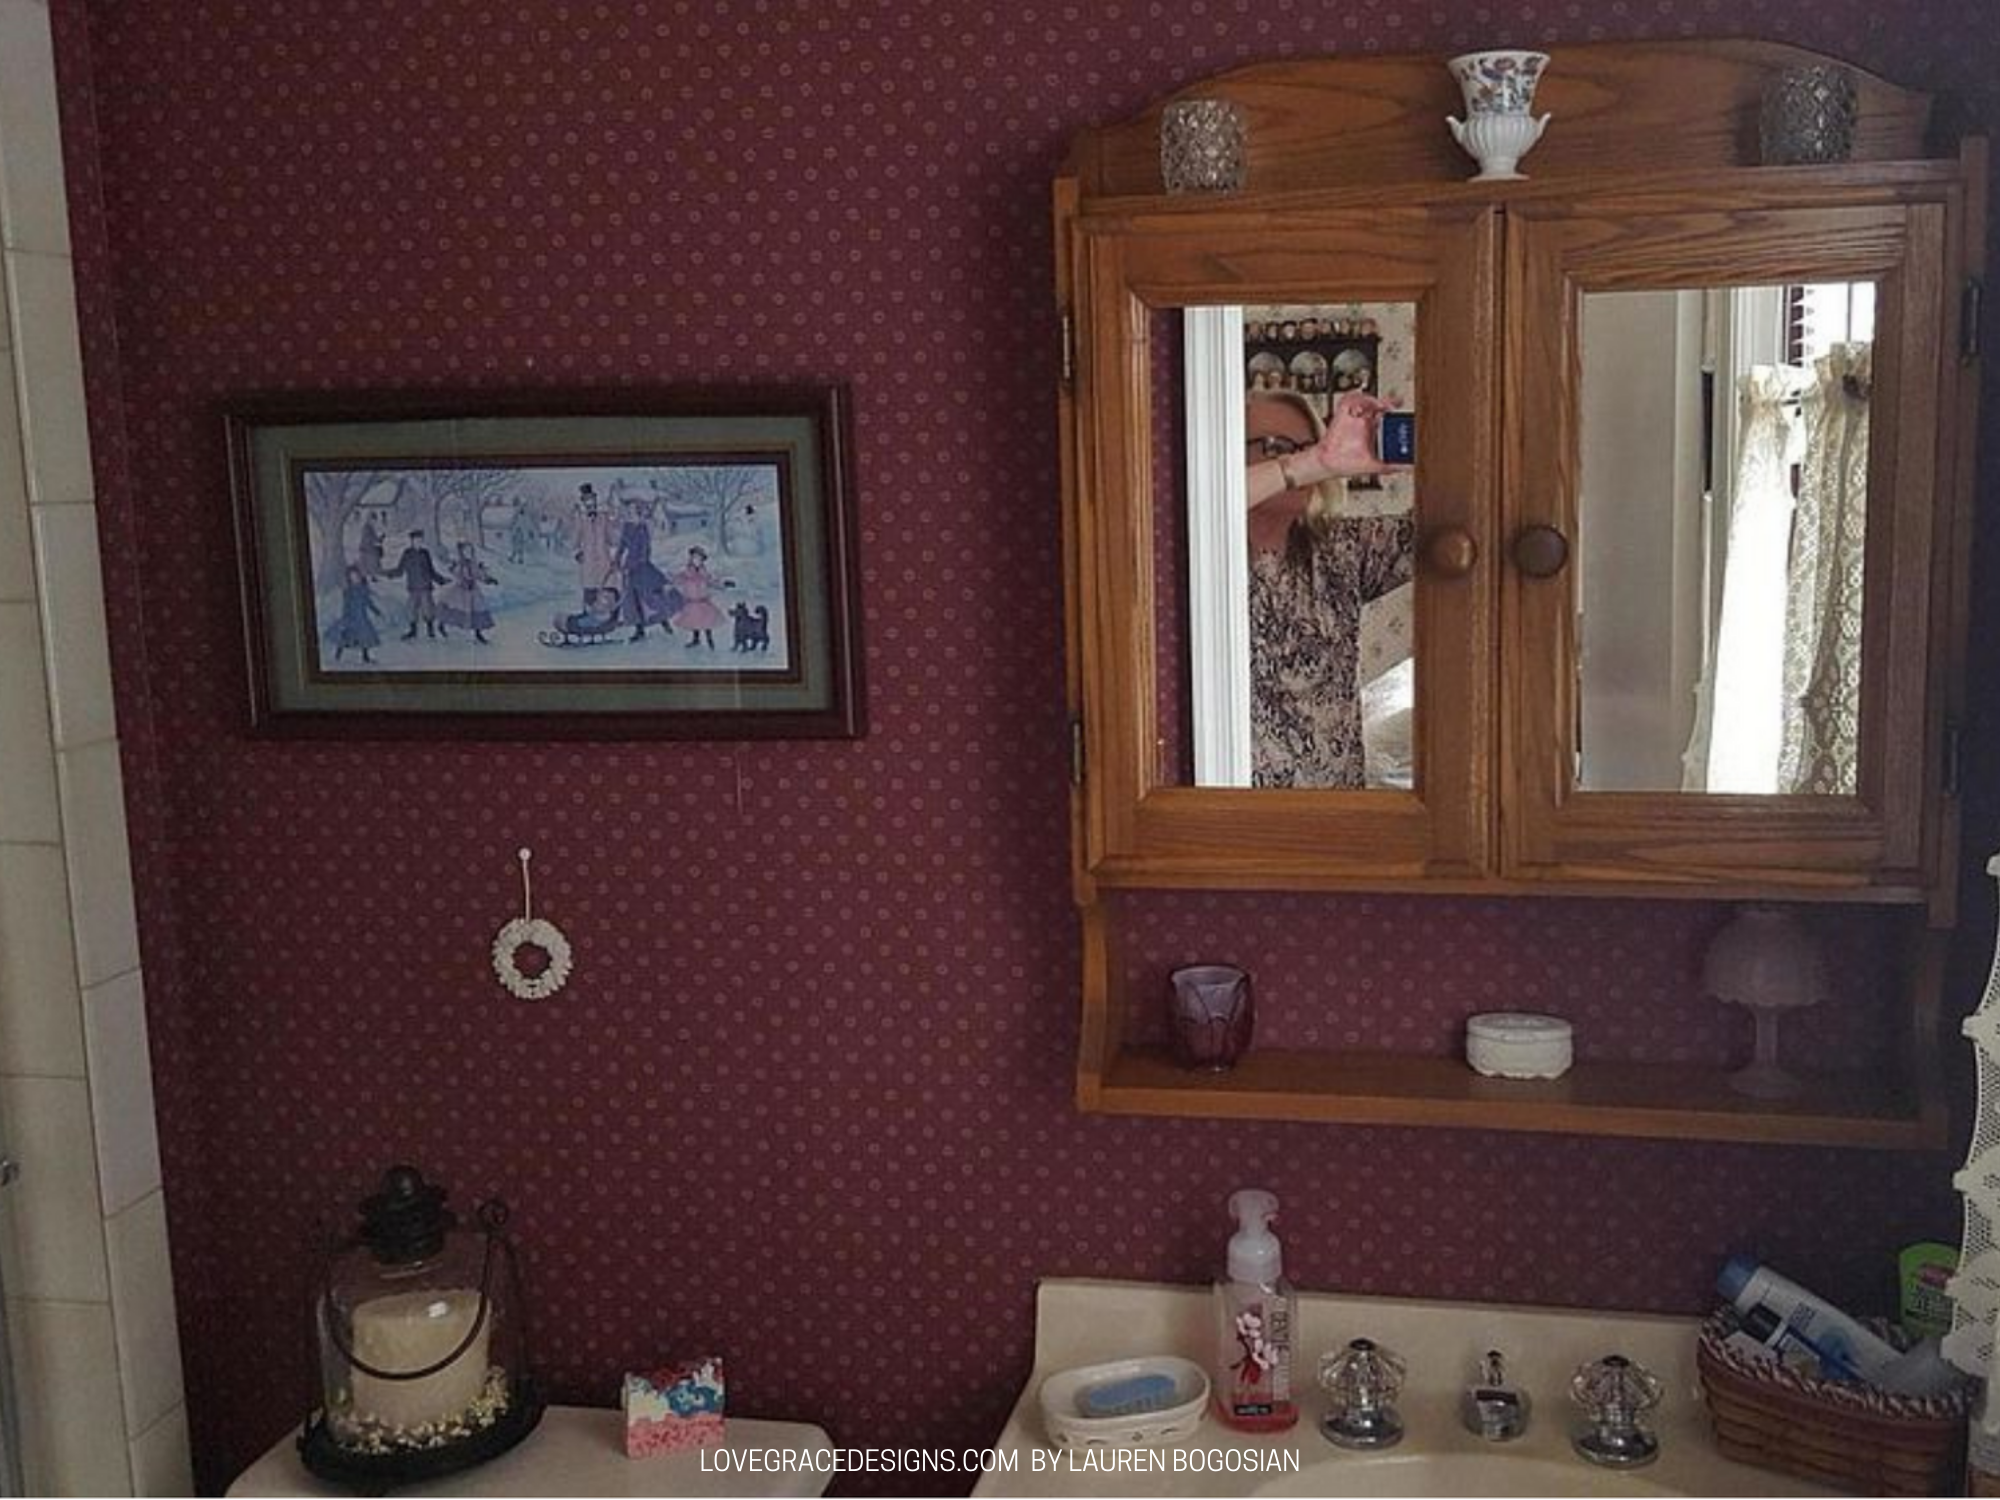
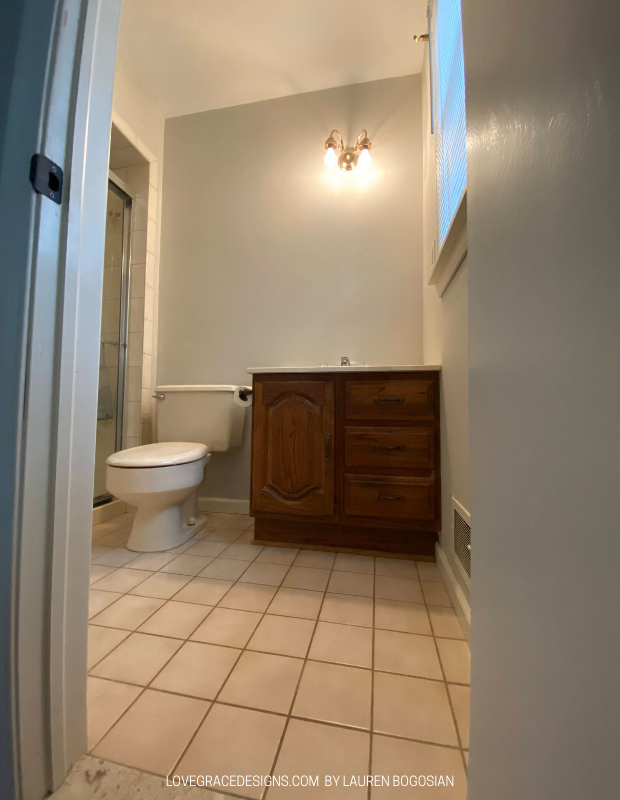
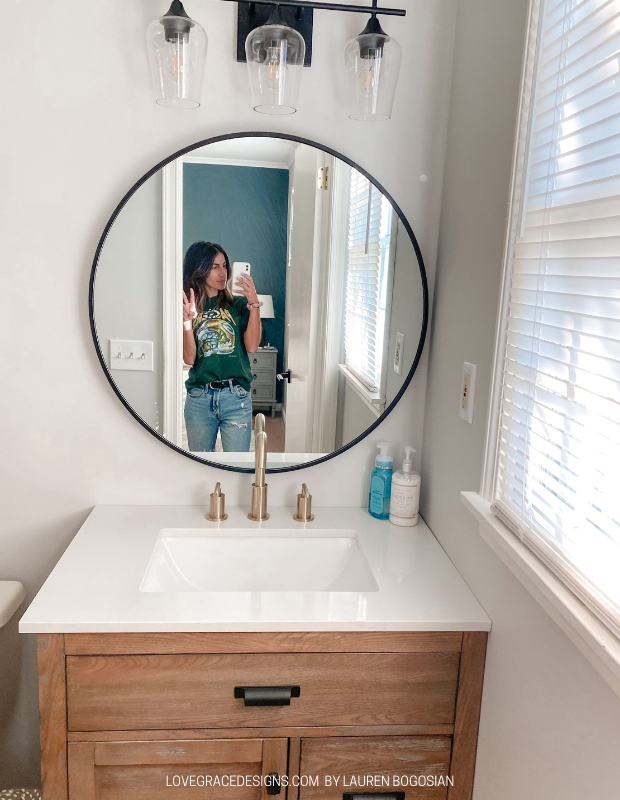
Master Bathroom Updates
Our master bathroom is something we would definitely like to completely redo (in addition to our kitchen) but it’s not in the budget right now. So instead, I wanted to do some updates that I knew could hold us over and also still be used when we eventually redo it.
Those updates included a new vanity, new mirror, new light fixture, new faucet, and new shower head. I have a whole post about our bathroom remodel coming very soon!
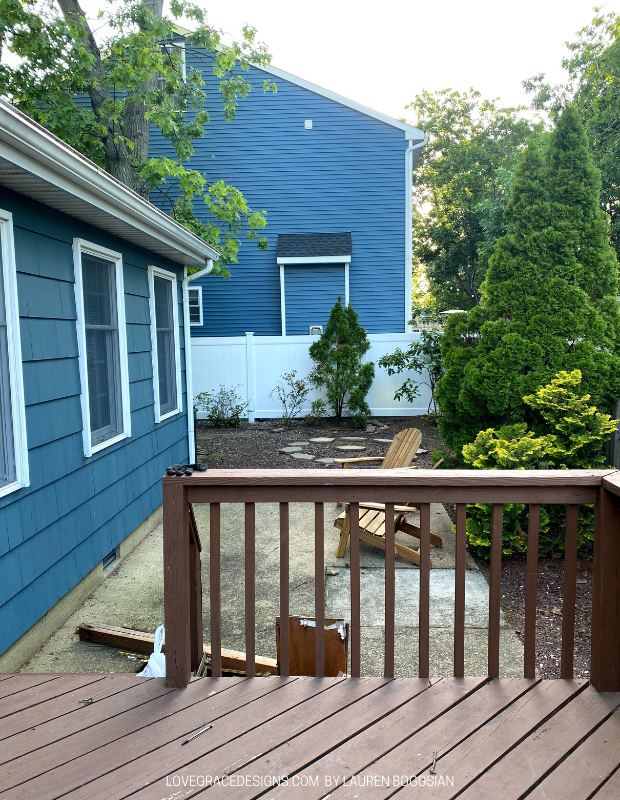
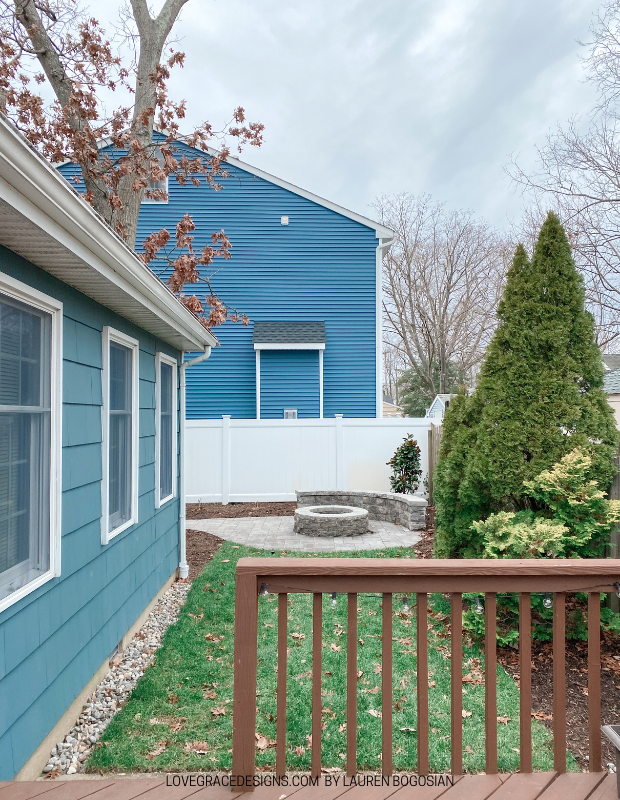
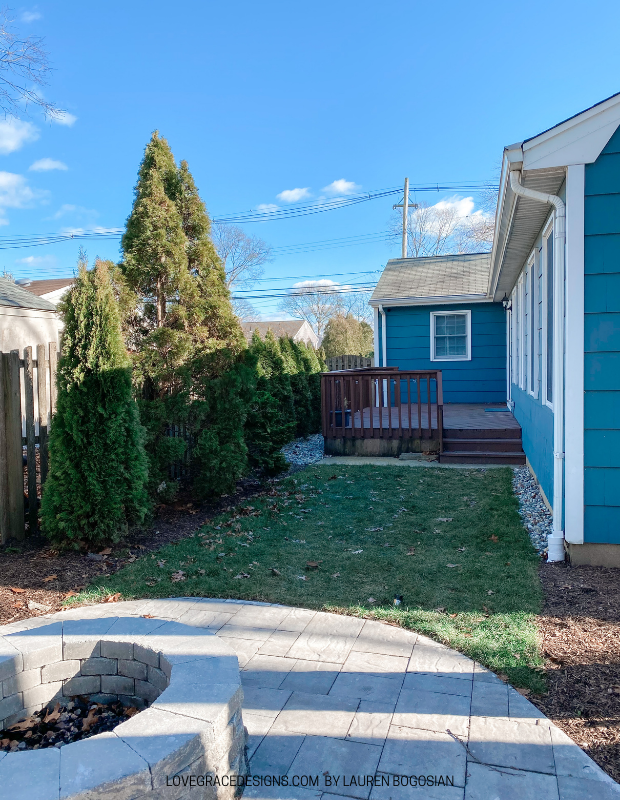
Backyard Landscaping Makeover
One of the more exciting renovation projects that came out of 2020 was our backyard makeover! We removed the tree in the spring knowing we would eventually want to do something to that area. With COVID continuing to have us be home more, we kind of fast tracked that project to happen in the Fall instead of a few years from now.
Budget wise, we knew we would not be going on a big vacation in 2020 and most likely not in 2021. So we put what we would probably have spent for those things into our backyard instead.
We hired a landscaping company to come in to do all of the work instead of trying to DIY some things. They are our family friends and my brother actually works with them! They first began demo by removing all the old stone, removed all of the bushes, and removed the concrete pad that was off of our deck. We will eventually bring those steps across the whole deck (that will be a DIY project) so they left a piece there for the steps to lay on.

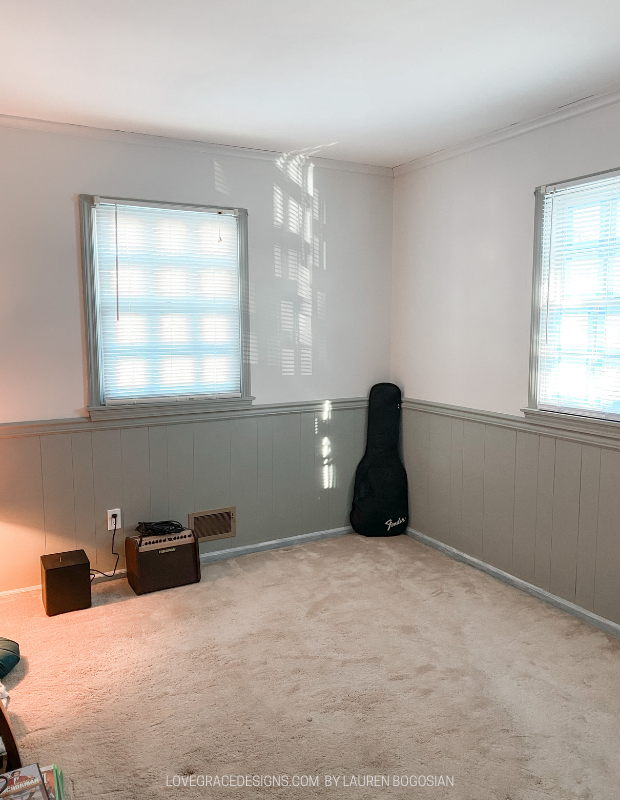
Wallpaper Removal & Paint- Blue Room
We didn’t begin wallpaper removal in this room until the end of October. We ordered a pull out couch for this room to be the designated guest room so we had a goal to get the walls completed sooner rather than later. This was another room that had paneling halfway up the wall and we decided to keep it in this room too. Steve removed the wallpaper and then we prepped the walls for paint. The bottom trim is tricky to paint because of the carpet so I will have to go very slowly with that- haven’t been able to dedicate a day to it just yet, but soon!
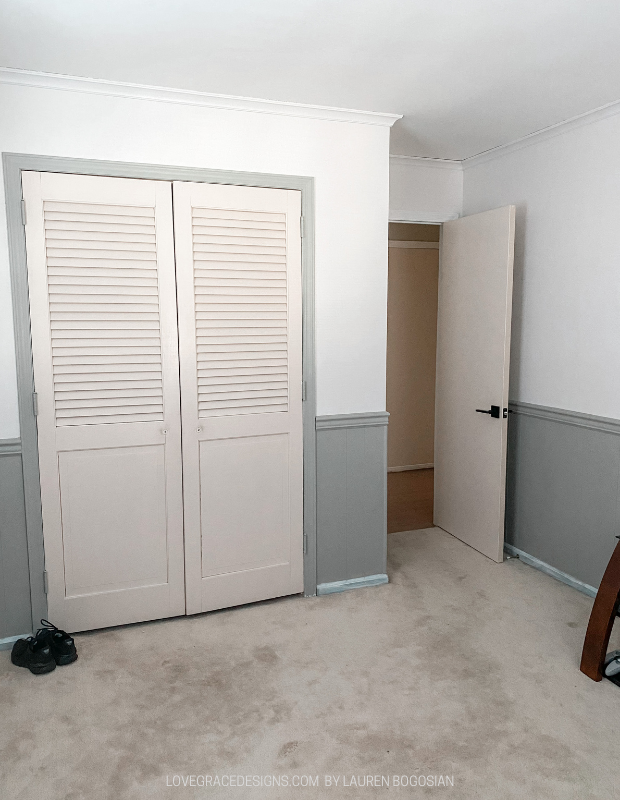
The windows and the grate inserts in here were also painted blue and we decided to paint them white so all of the windows in the house are the same. Then hopefully we will never have to paint them again! Taping the windows off is a multiple hour job. It took me an entire Saturday afternoon to tape and prime just the grate inserts on two windows. We haven’t actually painted the windows yet because that will be a longgg project that needs to be done in the entire house.
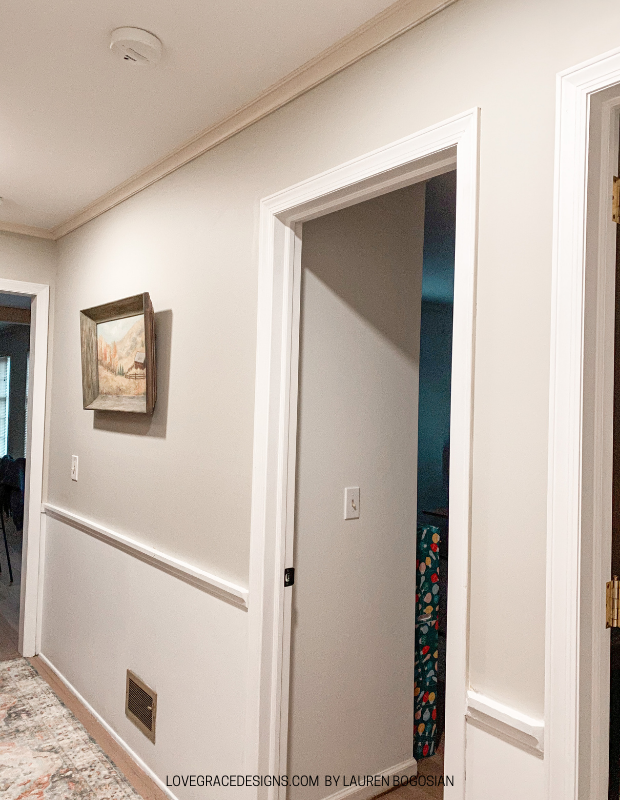
Trim Paint
When we painted in 2019, I mentioned that I left the hallway trim around the doors half painted.
We finally just got to painting it this December…so yes, a whole year went by without painting it. Steve finished the rest of the half painted trim in the hallway and I am so grateful! You can see the difference in the original molding paint color vs the new white color we painted the trim around the doors. I now have to paint all of the top molding throughout the main areas of the house the same white (that was the trade off) and we will do the windows and doors in the entire house together, so that’s on our growing renovation to-do list for 2021.
Those are all of the renovations we’ve done in less than a year and a half. It’s a lot but as you can see there is also still a lot to be done. We are thankful that most of them are cosmetic updates at this point so we can pick and choose what we want to DIY and what we will save for another time if using a professional would be a better fit.
If you are looking to renovate your house or your future home, is this timeline and renovation reality what you had in mind? Did you know it’s not all fairies and rainbows or did this shock you?
If you are in the middle of renovating your home or have completed renovations, did this bring back any memories? Good or bad?
I have honestly loved the entire process of making this house our own. It is definitely tiring and hard but there is still that element of fun and excitement. Doing it together and knowing that most of the updates were from our own hardwork makes us smile (and high five) when we think about where we started!